Tips, tricks, tutorials and more on how to scrapbook, how to stamp, how to make cards, how to use a Cricut, how to use Make The Cut, how to use Lettering Delights SVG and other files, how to alter items, and more.
Welcome to the Scrapbook Generation Blog Hop for June! If you've come here from Tasha's Creative Juice, or if you're just starting out, you are in the right place. Just be sure to complete the entire circle and leave comments on all blogs for a chance to win a sketch bundle of your choice.
I chose to use a sketch from the 4th of July bundle, creating a layout for (surprise, surprise) a 4th of July parade.
If you're one of my regular readers, you'll recognize many of the same products I used for the Stamp of the Month blog hop the other day. If you want to shop for anything, I'll have links at the bottom of this post.
The papers are all from the Jubilee paper pack. I used some no-name gel pens for my stitching and my journaling.
The fireworks are some of the leftovers from the big stash I stamped and fussy cut last time using the Kaboom stamp set (June stamp of the month). Remember, don't be intimidated by fussy cutting! It's easy to do while sitting watching TV, talking on the phone, waiting for dinner to finish, etc. I popped some of them up using 3-D Foam Tape. The title is stamped with the Framework alphabet stamp set and a discontinued stamp set called Doodle alphabet.
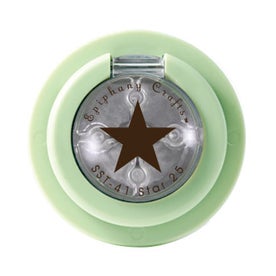
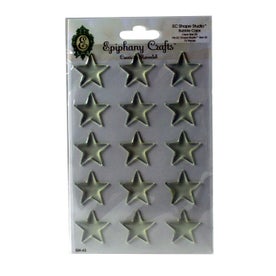
These star accents were punched using an Epiphany Crafts Shape Studio tool. I added an epoxy bubble to the center star only.
You
can find the SG sketches in their books and as downloads in the SG
store, and there is a free one every month in case you want to try it
out.
Next on the hop is Cicily, leave a comment on each blog and one
lucky commenter will receive a free sketch bundle of their choice from
the store. The winner will be drawn on Monday, June 9th which leaves you
one week to leave a comment.
Are you looking for a pot of gold at the end of the rainbow? Well,
you’re in luck at this blog hop! We’ve got great projects from very
creative designers today! So if you started at Janet's Creative World,
then you’re in the right place. If not, please make sure you stop at
all the blogs and leave a comment. Janet is giving away a Close To My
Heart Cloud Nine Cardmaking kit valued at $45.00. (See a picture at the
end of my post or on Janet's blog.) How’s that for blog candy?!
And now, on to my project:
Now while this may look like a card (and does happen to be 5"x7" size), this is NOT A CARD - it's a decor item! I like that it goes flat for storage because I have enough holiday stuff taking up storage space as it is!
I started by creating the main background panel. I cut white cardstock to 4.75"x6.75" and random stamped the entire piece. I used the Multi Step Shamrocks & Clover stamp set from Kitchen Sink Stamps with Exclusive Inks stamp pads in Sweet Leaf, Topiary, and Ponderosa Pine from Close To My Heart. After stamping, I used a Sponge Dauber and the Sweet Leaf ink to edge the entire piece. I then adhered it to a piece of Topiary cardstock and trimmed it to a 1/8" border all around using the new Perfect Layers Mini and an X-acto knife on the Perfect Cutting Mat.
Next, I cut this white center panel to 3"x4" and stamped my sentiment in Topiary ink. The sentiment is a discontinued stamp from River City Rubber Works called May the Road Rise. If you can't find a similar stamp, you could always print the saying from your computer. I again used the Sponge Dauber with Sweet Leaf ink along all of the edges. Using Liquid Glass, I adhered this panel to a scrap of Tan Glitter Paper from Close To My Heart (looks gold to me!). Once dry, I again used the Perfect Layers Mini to mat it at 3/16" on all sides. I then adhered that to a scrap of Ponderosa Pine cardstock and trimmed that at 1/16" on all sides. I adhered this entire piece to the main panel, centering it side to side and about the same distance from the top.
The next step was to create an easel so my piece would stand easily. I cut this using the Fancy Frames cartridge with my Cricut, set at 6.5". I still trimmed a tiny bit from one side, as it cut slightly wider than my piece and I did not want to make the backing any shorter. I adhered it to the back of my piece with adhesive on the top and both sides only.
Finally, I got to the fun part: adding all the "stuff"! First I made a double bow with a Bow Easy tool. I adhered a length of ribbon across the front of the card using Scor Tape, and adhered the bow to the ribbon with a Glue Dot. Next, I pulled out my Epiphany Crafts Shape Studio Tool Heart 25 and Bubble Caps. I created a shamrock shape by making 3 hearts from a scrap of paper from the Jubilee paper pack from Close To My Heart. I adhered that slightly behind the bow, using 3-D foam tape to pop it up. Then I pulled out a big pile of small paper and plastic flowers from my stash of neutral colored flat flowers and assembled these using some mini and small green brads from my stash. I adhered them all around the shamrock and bow using some more Glue Dots. Finally, I stuck in a few Making Memories stick pins in green and I was done!
I really love the way this project turned out, and I hope you do too! I'm also linking this project up to the "Feeling Lucky" challenge over at Heart 2 Heart Challenges - be sure to check it out.
Now do an Irish jig over to Alicia's blog and see what she has in store for us - I can't wait to see!
Here’s
the line-up should you get distracted by other Leprechaun trying to
trick you! Thanks for joining us today and be sure to wear green March
17th so you don’t get pinched!!
Don't
forget to visit and comment on ALL the blogs for a chance to win this
great prize from Janet. Now there’s some gold you’ll want to have a
chance on!
If you've been visiting me for a while you know a few basic things about me:
I LOVE sketches and patterns on which to base my work. They leave out the hard work and let me concentrate on the "fun" part.
I generally work with only certain brands of paper. I have found over the years that quality matters when I'm putting things together, and certain brands also fit my style(s) more than others. So, you're likely to see things on my blog using Close To My Heart (of course), Graphic 45, Echo Park/Carta Bella, and My Mind's Eye, with the occasional rogue brand thrown in.
I dig a good challenge. I like to stretch myself with different challenges and see how my projects are similar and different from other people's choices.
So, when one of my favorite places decided to produce a digital scrapbook magazine (the magazine is digital, not my scrapbooking, lol), I was all in! (Yes, pictures are coming I promise - keep reading!) I have been in love with the sketches from Scrapbook Generation for a long time. The clean lines fit my style and I find them easy to modify if I need something slightly different. For the premier issue, they wanted items for their Readers Gallery that fit 3 of their specific sketches. I submitted to each category and had the pleasure of having all 3 selected for publication! Here are my projects that were published in the January issue of CREATE magazine.
For this 2-page layout, I used mostly Bella Blvd products, along with CTMH cardstock and Epiphany Crafts shape tool and star bubble caps. I modified their sketch slightly by rotating the left page to use a landscape main photo instead of portrait. You can find this project on page 197.
This single page layout was so much fun to create. It is the title page for a vacation album, and can I say that I just love how the focus is really on that dragon head?! You know I don't do single pagers anymore, except first & last in an album, so I want them to be extra special and this fit the bill perfectly. Graphic 45, Bazzil CS (it seriously looks like leather guys), and title cut with my Cameo using fonts on the computer. You can find this one on page 206 of CREATE.
This is one of my favorite manly cards I have ever made. Echo Park paper & stickers, CTMH & Bazzill CS, and Epiphany Crafts round bubble caps & setting make a masculine but not-so-serious card. Both the Mustache and speech bubble are from the Artiste Cricut cartridge. You can see this card in a spotlight on page 215 of CREATE.
I would love it if you go check out this fabulous new magazine. And, did you know that Scrapbook Generation is also a scrapbook STORE? They have a fabulous brick & mortar in Springfield, Missouri. My goal is to someday go to one of their fabulous weekend crops, but it is quite a drive from Northeastern Illinois! Luckily for all of us, they also have a newly revamped online store where they carry many of my favorite brands, as well as all of their fabulous sketchbooks in hard copy and digital format. I receive absolutely no compensation for saying that I highly recommend them!
Thank you for sharing in my excitement today! I'd love to read your comments, then be sure to go download your copy of CREATE and see all of the other designs using these same sketches, plus some great articles.
Today I have an extra special (and extra long) post for you. I'm submitting to a design team call for the May Arts Ribbon Blog, so I have three fabulous projects and a tutorial today! I absolutely love ribbon, and the variety of things it can be used for, so it was rather hard to narrow it down to three fabulous uses for this post (but I finally managed).
First up, I have a gorgeous garden party hat. I started with a "plain Jane" $7 floppy hat from the farm store - you can find a similar one in nearly any discount store I'm sure. I made magic with a few types of ribbon and a couple of feathers, and this is what I ended up with:
I started by making a hatband from a 3" wide green mesh ribbon, and tied it in an oversize bow. My big beautiful flower was made in three layers. First, I made a rolled layer using a 5/8" dark turquoise ribbon and a small Gluber. For the second layer, I gathered one edge of a 1 1/2" light turquoise ribbon using the longest stitch on my sewing machine and some upholstery thread. (Upholstery thread is much heavier than sewing thread, and won't break when gathering long lengths of ribbon.) For the final layer, I pulled out a bit of sheer glittery wire-edged ribbon. I removed the wire from one side, and gathered the wire on the other side for the center. I layered everything up, using an additional Gluber, and used a couple of Glue Dots to secure the large beaded button to the center. I stuck in a couple of feathers (one colored with my Copic Markers) for fun, and I was done.
My hat had its grand debut at my local Woman's Club annual reciprocity meeting. We met in a lovely mansion, and my hat fit right in!
Next in line is a scrapbook layout, declaring our favorite place for July 4th fun:
I love to use ribbon & fiber on layouts, and layer them up or use them in unexpected ways.
For this layout I chose to use ribbons that coordinate well with the slightly distressed feel of the papers. I used a 3/8" natural twill, and layered on a 3/16" string/loop trim. For a little extra pizazz, I added small silver star brads every 2 1/2" - and it has the added benefit of helping the string/loop lay flat!
I added some corrugated stars, which i swiped with white pigment ink, and used more of the string/loop to make them look like shooting stars. The little snips were easy to cut with my i-magicut ribbon cutter from Imaginisce, and they are easy to adhere to paper using Liquid Glass from Close To My Heart (or Glossy Accents from Ranger).
Cricut Expression with Country Life and Calligraphy Collection cartridges, Provo Craft
silver star brads, from my stash
red metal fasteners (on ends of ribbon), from my stash
My final project is some seasonal home decor. My regular readers may remember that I have a pretty grapevine tree in my kitchen, and I've been trying to spread out my costs for seasonal decorations by doing it a bit at a time. With my latest creations, I am now set for Memorial Day through July.
I had purchased the tin star ornaments and Uncle Sam last year, so I recently made two additions. First, a patriotic banner garland:
I stamped "U", "S", & "A" on 7 sets of three mini pennants ans added some additional stamped designs as well. Then I made 8 star epoxy shapes using the Epiphany Crafts star Shape Studio tool, and adhered them to 8 of the mini pennants (see below). I strung the pennants on 15 yards of skinny striped ribbon, starting with a star pennant, then a group of USA pennants, then a star pennant, and so on. I left several inches between each USA group and the star pennants on either side.
NOTE: If you have only a small area to decorate, this would look really cute in a smaller form! Just buy one pack of mini pennants, make a single USA group and 2 stars, string them up and hang them just about anywhere. You'll still have 5 pennants left for another project - Halloween "BOO", anyone?
Products used for the banner garland:
15 yards skinny patriotic striped ribbon, from the sewing store
Cranberry and Moonstruck stamp pads, Close To My Heart
To complete my decorations, I made some patriotic rosettes:
These are really easy to make, and take very few supplies. All you need is ribbon, needle and upholstery thread or twine, paper punched or cut for the center, and adhesive (I used Beacon 3-in-1, but Glue Dots would also work). You can experiment using longer lengths of ribbon for fuller rosettes, ribbon instead of twine for hangers, etc. Different colors make great decorations for Halloween or Christmas, or exchange the hanger for a stem & leaves and you have a flower. Check out my short video below to see how easy they are!
Thanks for stopping by today. I hope to see you again soon!