Showing posts with label Wishes. Show all posts

Saturday, August 1, 2015

Card Workshop With Framed SOTM

Hello and welcome to the August Stamp of the Month blog hop! I'm super excited to see everyone's posts this month because we all have some brand spankin' new products available to use with these versatile stamps.  If you've come  here from  Pam Trostle's blog, or if you're just starting out, you're in the right place. Just hop around the circle until you get back to where you started.

I had a lot of fun with this set of 12 stamps, and I didn't even use all of them. I have a feeling that most of my fellow consultants are using the new Zoe line this month, but I chose to focus on our new Cricut cartridge and one of the gorgeous new colors of cardstock that now comes in the Cricut collection. I used them along with a few existing accessories and the Wishes how-to book to make a beautiful set of 8 cards. I used one of the workshops in the book, but only made one of each card design instead of two.


Isn't that new Peacock cardstock gorgeous? I paired it with Lagoon CS and ink, black ink, and the Quatrefoil embossing folder for this card. I love how beautiful simple cards can be! I used some Thin 3-D Foam Tape on the central design, making it super easy to mail.

NOTE: While the new cardstock colors (8 of them all together!) are available as part of the Cricut Artistry Collection now, they are not available for separate purchase until September 1.  Coordinating ink pads are also not available until September 1.


For this card, I stamped the base with an image from one of the stamp sets that comes in the  Artistry Cricut collection. I used Lagoon ink and second generation stamping. I also added some Silver Shimmer Trim.


For this card, I used the Dot embossing folder and sanded the raised dots with the sanding block.  I used the frame stamp to make a background on my center panel. I used small Aqua Dots in the corners of the center panel.


For this card, I used the Chevron embossing folder. This time, I only lightly sanded the raised lines for a distressed look. The sentiment panel is again popped up on Thin 3-D Foam Tape.


Another card using the Quatrefoil embossing folder and Silver Shimmer Trim.


I again used the Dots embossing folder for this card, and layered Silver Shimmer Trim under the narrow strip of Lagoon CS.


This gorgeous Christmas card is my favorite! I love the alternative color scheme. I used the Damask embossing folder and Silver Shimmer Trim. Definitely a case of less is more.


This card shows you can make a card with impact even with scraps. I used the Chevron embossing folder and Silver Shimmer Trim. I popped the sentiment up with Thin 3-D Foam Tape and added some Aqua Dots for interest.

Click on the pic to see it bigger!

Here they are all together. This would make a fun gift set in any color, or an easy addition to your home card "store". You can make it on your own using the workshop in the Wishes how-to book, or if you live in my service area* I would be happy to teach this to your group!

If you would like to shop, the links below open in a new window so you can continue with the hop right here. Remember, when you spend at least $50 you can get this terrific stamp set for only $5 - don't forget to add it to your cart! When you're ready to move along, let's go see what Carol Horton has created this month.

*My "typical" service area covers most of Chicagoland, as well as the I-55 corridor to Bloomington and the I-80 corridor west to the Quad Cities area. I am also happy to visit NE Indiana, or other areas within approximately 60 miles of the 60442 zip code. Not sure if I can visit you? Just ask!

Framed - August Stamp of the Month
Artistry Cricut Collection
Stamp pads in Lagoon and Black
Sponge Daubers
Silver Shimmer Trim
Aqua Dots
Embossing Folders
Wishes How-To Book
Thin 3-D Foam Tape

Wednesday, July 15, 2015

Jump On It!

Welcome to our Jump On It in July blog hop! If you've arrived here from Haley Dyer's blog, or if you're just starting out, you're in the right place. Here's the scoop on Jump On It in July:

This month's special offer is a one-of-a-kind chance to get your favorite set of Hostess Reward stamps without hosting a party, for only $5. Or, you can choose July's Stamp of the Month for free. All you have to do is purchase $25 in current, retail priced stamps and the choice is yours!

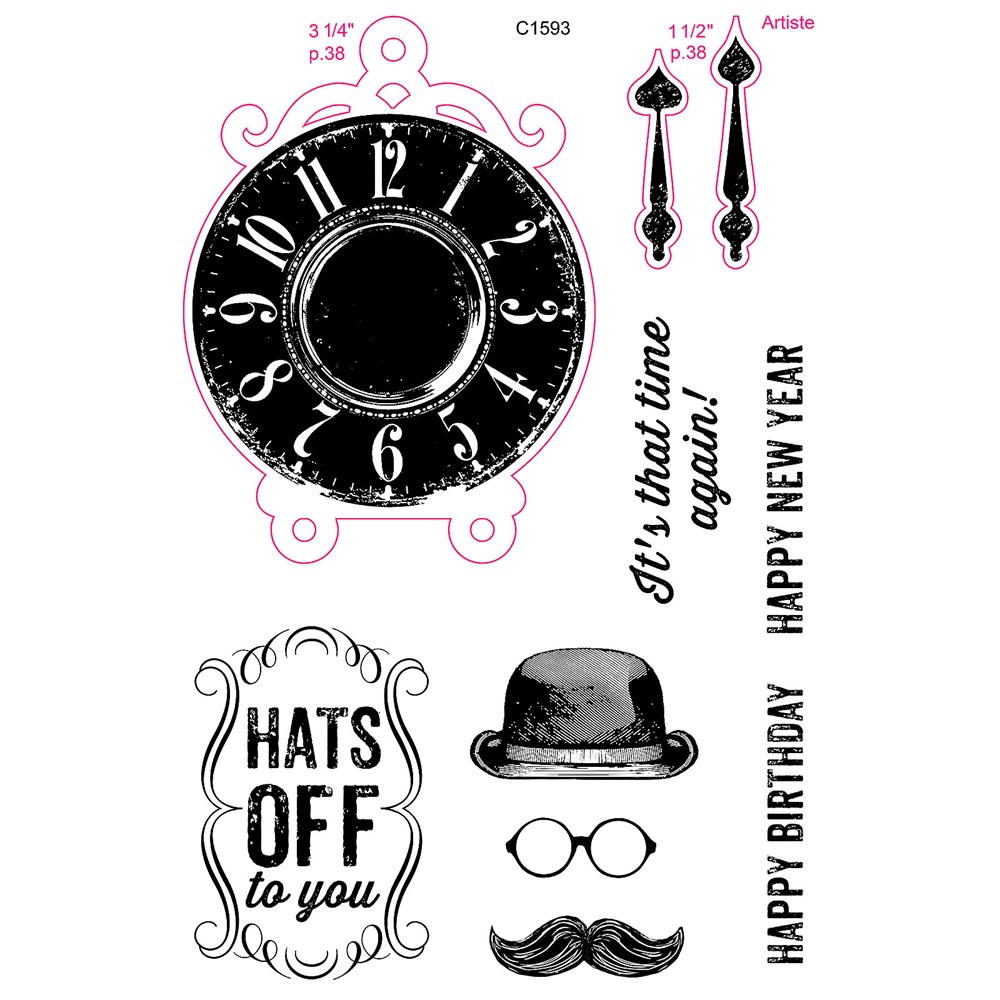
There are a lot of great stamp sets to choose from, and I'm sharing two of them today. This first card uses the Hats Off stamp set along with the masculine Jackson papers.


My card design is from the Wishes pattern book, and I used the Happy Birthday stamp from the set on the inside. This is a great masculine set, but that clock could make some pretty feminine birthday cards as well.


My second stamp set is Happy Hexagons, and I chose to make this card using only cardstock to show you how to really take advantage of this special.


The sentiment and hexagon border images are from the Happy Hexagon stamp set. To get this set, you can buy the other two sets I used for this card, and there are tons of other possibilities for the three sets.

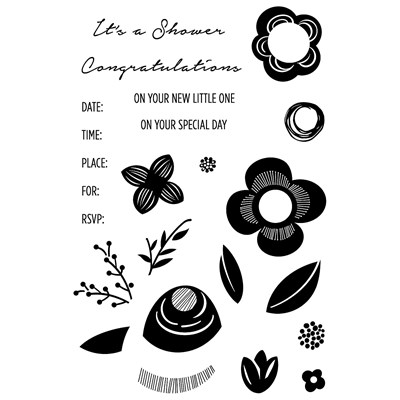
The single flower is from the Shower Flowers stamp set ($13.95).


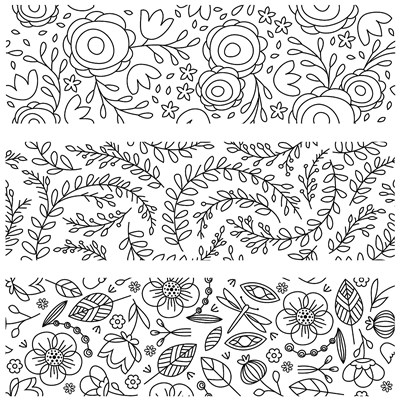
The allover patterns are from the Botanical Backgrounds stamp set ($17.95).


The background patterns can easily be stamped tone-on-tone, like the pear panels in my card, or can be colored in, like my white panel. I used our watercolor pencils on my card, but you could also use our Shinhan markers with great looking results.


Remember, this offer is only good for the month of July 2015, so be sure to jump on this chance while you can!  If you are ready to shop, you can use my picture list below. The links open in a new window so you can continue on with the hop as soon as you're done. When you're ready to move along, let's go see what Pam Ellison has created for us!

Shopping List for Card #1:

Jackson Paper Pack
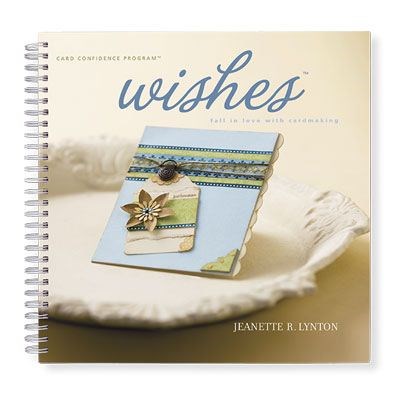
Wishes How-To Book
Kraft Cardstock
Stamp Pads in Glacier, Barn Red, and Cocoa
Hats Off - Promo appears in cart when you qualify!


Shopping List for Card #2:

Cardstock in Pear and White Daisy
Make It From Your Heart - Vol. 2
Stamp Pads in Pear. Glacier, Sunset, and Canary
Watercolor Pencils
Shower Flowers Stamp Set
Botanical Backgrounds Stamp Set
Happy Hexagons - Promo appears in cart when you qualify!

Wednesday, April 30, 2014

You've Got a Friend - May Stamp of the Month Blog Hop

Hello and welcome to our May stamp of the month blog hop! If you've arrived here from Michelle Stewart's blog, or if you're just starting out, you're in the right place.  In case you get lost along the way, I have a list of all the participants right here.

This month's stamp set contain 5 unique images that are just crying out to make cards. Of course, most of them would also be a great addition to a scrapbook layout as well.  I chose to make notecards with mine, and for today I decided to do something different for me; there is NO patterned paper on these. I used patterns from our Wishes how-to book for all three cards. Check them out:


May means we are finally nearing the end of the school year, so I started with a card for a teacher. I stamped the image with Outdoor Denim on both Sky and Pacifica cardstock, cut out the layers I wanted, and sponged with Pacifica ink. The Honey Triangles are Washi Tape, and the chevron pattern is made with our new Chevron Embossing Folder on Cranberry cardstock. After embossing, I sponged some Cranberry ink on the piece to really play up the depth.

Note: on the embossed piece, the blank area at the top is created by placing my paper all the way against the fold at the top of the folder.  If you want all pattern, you simply need to place your paper lower in the folder.


Here's another that I thought would be great for a teacher.  I stamped the image on Smoothie cardstock with Ruby ink and on Sweet Leaf cardstock with Topiary ink.  I then cut out the layers I wanted and sponged the leaf with Pear ink and the apple with Cranberry ink. I used Smoothie Stripe Washi Tape for the patterned strip on the end. The green patterned strip is Sweet Leaf cardstock embossed with our Quatrefoil Embossing Folder and sponged with Pear ink.


Finally, I created a card with the namesake stamp in the set. This phrase still reminds me of Toy Story so I used a "Woody" color scheme. The background pattern is created with one of the stamps from the Art Philosophy Cricut cartridge collection, and the tag is also cut with this cartridge.  I used Honey and Pacifica cardstock and ink, Cranberry ink, and Woodgrain Washi Tape. I added some twine to tie on the tag.

I hope you liked my ideas today. I also have a stunner 5x7 card, but I can't share it until later in the month because it's being published in Create magazine. Be sure to stop back later in the month (or subscribe by email or follow on Bloglovin') to see it!  Now, when you're ready we can go visit Sheila Bennett's blog and see what she came up with this month.

If you're ready to shop, here's the list of supplies I used:

Saturday, December 31, 2011

Welcome Little One - January Stamp of the Month Blog Hop

Hello and welcome to January's Stamp of the Month blog hop!  This month we are featuring "Little Reminder", a set of 25 stamps available only for the month of January.  If you've arrived here from Beth's Creative Block blog, or if you're just starting out, you are in the right place.  When you're done here, you'll hop along to Shirley's Mom n Me blog.

As soon as I opened up this stamp set, I knew I wanted to make a special baby girl card for a friend who recently had a baby.  I pulled out my Sophia paper pack and some other supplies, in addition to the stamp of the month.  I found a pattern I liked in the Wishes book, and modified it only slightly for what I had in mind.  Here's how it turned out:


I used the Cricut Art Philosophy cartridge along with the stamp of the month set and the Hooray Bouquet stamp set for the circles, 3-D flowers, and leaves.  I also used a Sophia journaling spot (currently just $1 while supplies last!) on the front for a slightly different feel.  If you'd like to learn how to make the flowers I used on this card, you can watch this video I made.


Following is a list of all the supplies I used for this card.  The links will open my website in a new window, so you don't have to worry about losing the rest of the hop!

Now, don't forget to hop along and see what Shirley has in store for us this month.  Leave a comment if you have the time, and I'd love it if you'd become a follower!  Thanks for stopping by and I hope to see you again soon.

    Monday, April 18, 2011

    Tutorial Tuesday: Custom Stamped Embellishments

    Today is another installment of Tutorial Tuesday at the Cutters Creek Design Team blog, and it's my turn to share again!  Be sure to check out the CC blog so you can see all of the great ideas from the other DT members as well.

    Welcome to another installment of Tutorial Tuesday!  This month features stamping, and I thought that this week I would share an unexpected combination of products used to make some cute custom dimensional embellishments.  So, we'll be using stamps (of course) and the Imaginisce iBond cordless glue gun with colored glue sticks!

    Have you ever looked at colored glue sticks for glue guns and wondered what on earth you would want to use colored glue for?  Today I have just one splendid little answer for you.  Let's make dimensional embellishments!  But first, I have to say that I LOVE the iBond glue gun - the cordless feature makes it so easy to get things done without wondering how the heck to get that cord out of the way.  In fact, I have several other projects I can already think of that I''ll be using this for this year.

    Now, rather than ruin the surprise, I'm going to make you wait until after the tutorial steps to see what I've made.  Just check out these steps:

    First, you will need a non-stick surface and your iBond loaded with the glue sticks of your choice.  Turn on your iBond and let it rest on the mat.  (Another great feature of the iBond - there's a light at the tip so you ALWAYS know when it's turned on!)

    While that's warming up, you will want a few additional items.  Choose a small stamp image, stamping block if acrylic, and ink for your stamp.  You need to ink up your stamp for this process, but most ink will not stay on our stamping surface.  You can just use a clear ink for no color, or Staz On if you want your image colored.  I chose to use a red Staz On for my image, just so it would show up better in the photos.

    First step: coil a circle of hot glue slightly larger than your stamp image, making sure your coiled glue lines are touching.  You may want to experiment with the thickness for some different effects.  (I apologize for the odd picture here - it's hard to glue left-handed and take a picture right-handed!)  I tried to keep mine about the thickness of the stream that comes out of the tip.  Colored glue tends to be stiffer than clear, but you should still have plenty of time before it hardens up.


    Once your circle is made, quickly ink up your stamp and press it into the hot glue.  Leave the stamp in place for a minute while the glue cools, then you can pull the stamp out of the glue and peel the glue off of the non-stick surface.


    You now have two options with your stamped piece: leave it in a circle, as I chose for my card, or trim it down around the image.  A nice thing about using glue is that it trims super easily with a pair of fine-tip scissors.  At left is an example of a trimmed image.  This would look cute at the center of a ribbon bow, or perhaps three in a row on a card front, mounted on circles or squares.  When left whole, these embellishments give the appearance of wax seals, with a lot less fuss.


    Now, on to my end product!  I created a card and used my embellishment as an accent piece in my design.


    Using a card sketch from the Wishes book and some discontinued papers from my stash, I got to work!  The cute girl stamp image is Cheeky Howdy from The Greeting Farm and the cherries stamp image is from the Kitchen Classic stamp set from Crafty Secrets.  Cheeky Howdy's outfit is paper pieced (see last week's Tutorial Tuesday on the DT blog), and the scalloped mat/frame is from the Elegant Edges Cricut cartridge.  I cut the rosette using Make The Cut software and the Accordion Fold Rosette SVG set from Lettering Delights.  I adhered the stamped glue embellishment to the center using Glossy Accents to ensure it stays put.  As a finishing touch, I added Xmas Red Stickles to the cherries in my girl's hair and the circle cut-outs in the frame.

    Saturday, July 31, 2010

    Something Splendid - August Stamp of the Month Blog Hop

    Welcome to the August Stamp of the Month blog hop!  This month we have over 60 consultants participating in our hop, so you're sure to find Something Splendid along the way.  If you're arriving here from Terri's The Midnight Artist blog, you're on the right track.  If you're starting here, you'll move along to Beth's Creative Block and on around until you arrive back here.

    (On a side note for my regular followers, I know it's been a while since I've posted.  I was gone all week to CHA, so I will have some updates beginning Monday on that!)

    August's stamp of the month set is Something Splendid, 13 stamps sure to give you some beautiful results.  I chose to use our lovely Passages paper pack, along with the Celebration Card Workshop from the Wishes card confidence program book.


    Here are just 3 of the 6 card patterns included in this "workshop".  You make 2 of each pattern using just 2 sheets of cardstock and 2 sheets of pattern paper, plus card bases (6 sheets of CS).

    I think this is my favorite of the cards.  Even with that big, two-step flower, it still has a bit of a masculine look.  I sponged the edges of all of my papers for some added dimension.  The base flower was stamped 2nd generation in Barn Red (ink up your stamp, stamp off on a scrap, then stamp on your paper).  Then the detail layer was stamped normally in Barn Red and the flower center in Garden Green.  Pewter brads finish things off.

    For this card, I switched to Brown Bag ink for my flower base and stuck with Barn Red for the detail layer.  I used twill tape instead of ribbon to keep with the more masculine feel.

    Finally, I kept it very simple on this card.  I went back to Barn Red for both layers of my flower, and left off the embellishments entirely.

    If you're inspired to make this stamp set your own, just visit my website to find out how you can get yours at a discount or even free!  When you're ready to hop along, head on over to Beth's Creative Block.

    Thursday, April 15, 2010

    You Rock! - Product Spotlight Blog Hop

    This is my first month participating in the Close To My Heart product spotlight blog hop. It's just a group of consultants spotlighting a particular product or products each month, to give you more ideas. This month we are featuring the new papers in our Spring 2010 Idea Book.

    If you've come here from the Paper Crafting Princess, you're in the right place. When you're done here, you'll move along to Amy Edwards' Paisley Playhouse blog.

    I chose to use the You Rock papers this month, as it is my favorite of the new papers for Spring. SO useful for teens and more. I'll share two projects to give you a little idea of what you can do...

    First, a NO STAMPING card:

    I used leftover items from my Workshop on the Go "best" kit for You Rock, including two Top Coats elements. I left my card blank for now, so I can choose later to use it for Birthday, a nephew's upcoming graduation, or something else.

    I used the Medallion pattern for a 5"x7" card, on page 52 of the Wishes book. First, I distressed the edges of all papers with my Outdoor Denim ink pad, direct to paper (optional). I adhered my star & swirl Top Coats element using Liquid Glass under the star only, leaving the rest of the design loose. I layered my two circles, the "Spirograph" Top Coats element, and the button, and used my paper piercer to pierce holes through the three layers that matched the holes in the button. Then I tied all the layers together with the hemp. The entire piece was then adhered using some 3-D foam adhesive tape. A pretty simple card using my leftovers!

    I'd also like to share the layout I made using the workshop on the go guide for You Rock. I think it shows the versatility you have with this paper.

    You might think You Rock is more suited to teens, but it looked great with these pics of my 4-year-old's first day of school last fall! (I changed the sizes of the pictures in the layout to work with my photos better.) Click on the picture to enlarge and see the great details in this workshop layout - cutout stars, bitty sparkles, stamped images on the B&T paper, buttons - SWEET! I just love these papers, and I can't wait to use it even more - my 7 & 8 year old daughters both got guitars for Christmas...

    For more details on this Workshop, contact me or your local consultant. Now, if you're ready to see what Amy has created for you this month, hop on over to the Paisley Playhouse!

    National Scrapbook Day reminder: If you're in my area (SW of Chicago in Will County), I'm hosting an all-day crop on May 1st. Contact me for details!
    Related Posts Plugin for WordPress, Blogger...