Showing posts with label Making Memories. Show all posts

Tuesday, January 8, 2013

Decorative Storage Options

Today I posted on my "Our Clean House" blog again (finally!) - this time about storing extra supplies in the bathroom.  As usual, I didn't want plain boring storage, so I decorated mine to match the future beach-y theme of our bathroom.  You can see all of the organizing info over on that blog, but I will share the crafty goodness here.

I am using dollar store shoe boxes for some storage, and this is what a few of them look like:


 I wanted them pretty and The Husband wanted them labeled, so this is what I came up with.  I love a vintage look, so the tags I made (with the Art Philosophy Cricut cartridge) remind me of something my grandmother would have done.  I went shopping in my craft room, and I love the burlap ribbon but I wanted to add other kinds too.  First, it takes about a yard of ribbon to go around a shoe box. Second, I wanted to add some color to the mix. And third, I wanted to use up some of the ribbon I have laying around. (In fact, my goal this year is to use ribbon on as many projects as possible because I honestly have TOO much!)

The buckles I would guess are from Making Memories based on appearance, but I have had them so long I can't say for sure.  I tend to stock up on things on clearance so I'm sure I got them very cheap because I still have several left.  The silky ribbons are from the fabric store, I used some pleated American Crafts ribbon, and that lovely burlap is from Close To My Heart. The tags, as I said, were cut on the Cricut, and I distressed them with direct-to-paper Cashmere ink (CTMH). I reinforced the holes with large eyelets (another thing I need to use up!) and tied the to the ribbons with baker's twine, also from Close To My Heart. I wrote the labels with a pencil (my least favorite writing instrument!) to make them easy to change if the need arises.

I attached everything to the shoe boxes using Scor Tape.  It sticks well, but if I ever want to take it off, it will peel off fairly easily.

Thanks for stopping by today! I'd love to hear what you think of my latest project.

Monday, July 9, 2012

Clear Scraps Tutorial

It's my turn over at the Cutters Creek blog again, and since it's Tuesday that means it's time for a tutorial!  There was a question on the Cutters Creek Yahoo Group about the Acrylic Sheets from Clear Scraps, so I thought I would share a project and some tips about them.

These clear acrylic sheets are 12"x12", so they are the perfect size for scrapbook pages or decor projects.  They can also be cut with scissors, dies, and cutting machines (see video for cutting machine tips).  There are plenty of ways to take your projects from everyday to extraordinary using these cool clear sheets!  Today I have my most recent project to share with you, as well as a longer-than-my-usual video with more information.  There's just too much information to type out, so if you're not able to watch videos and have a question, just leave it here in the comments and I will respond as soon as possible.  Here are two photos of the layout I made:

Looks like an average layout, yes?

But aha, remove the cardstock behind and it's a super-cool clear layout!

This layout looks WAY more cool in the video where you can see the lights glaring off of it.  I think it would look awesome in a floating frame on a wall, but in my scrapbook I'll keep the yellow CS behind it so that whatever layouts are behind it in my album will not show through.  It still has all kinds of awesome dimension just perfect for my daughter's album!

Here's the video:

FYI: I checked and it looks like several of the Doodlebug Designs twine assortments have colors that will match this Echo Park collection.  (And as always, you can ask Kim any question.  If she's got items in stock, I'm sure she would be happy to color-compare for you.)

Here's a list of supplies I used that are available at Cutters Creek online store:
Other supplies used:
I'll have that layout with acrylic accents done soon, and I hope to have my new video on the clear cards finished by next week (kids home for Summer tend to slow me up some!).  Be sure to sign up to follow me by email if you want to be notified when they're posted.  There's a simple signup box near the top of the right hand hand column!

Thanks for stopping by today; hope to see you again soon!

Thursday, October 27, 2011

Mini Christmas Gift Tin with Echo Park Paper

So, the other day I was trying to be productive and clean up the scrap room, so I can really dive in and get some projects done for Christmas gifts.  As I was putting things away, I happened to see laying on the desk a hinged-lid bandage tin and a Tim Holtz knob.  Laying right there next to each other, they called to me to make something with them, so of course I did!  Here it is:


LOVE it!  I was totally inspired by the Season's Greetings collection from Echo Park Paper.  As soon as I pulled out the papers, I knew the poinsettia paper was the one to use.  So, to make my tin coordinate, I lightly sanded it down then sponged some parchment colored paint on to the areas that would show.  After it dried, I adhered the paper using Scor Tape.  My sentiment on the front was from the sticker sheet, but since I wanted to put it over ribbon I stuck it to chipboard first and cut it out to give it some dimension.  I inked the edges of it and the green border sticker using black ink.

Here are some more detail shots:

The black gingham ribbon is from my stash.  The poinsettias are from Making Memories - I added some yellow brads from my stash and blinged them with Yellow Stickles from Ranger.

The knob was added by marking my center, then punched it with my Crop-A-Dile.  The tag is from the sheet of adhesive chipboard shapes, and I just left the backing on the base piece.  I then tied it to the knob with some Doodlebug twine.  The clear adhesive gems are Bitty Sparkles from Close To My Heart.

Here's one last view from the top:


This is the perfect size for a special gift card or an earring box.  I wish I could tell you where to geet your own tin, but I have been pretty unlucky in locating a source (mine came from a warehouse-type sale).  If you have kids in your house, an alternative is buying tins of novelty bandages that come in tins.  Of course, these will all require sanding and painting for most projects.

Thanks for stopping by today!  Hopefully, I will be posting more soon with the ramp up to Christmas I have a great excuse to find time to craft!

Saturday, June 25, 2011

Borders, Borders Everywhere

Let me preface by saying that it is HIGH time I get myself in a Copic class.  I had one heck of a time coloring the face on this today, but I have vowed to practice more with them in the hopes that I will eventually learn to love them!

I've had very little crafty time lately, so I decided to enter a couple of challenges today so I would at least get to play a little before I dig in & get back to the drudgery of housework!  I based my card on a sketch for Which One Wednesday at the TGF Farm Fresh Challenge Blog, and opted to go all-in with some border strips for the Beautiful Borders Challenge in the Moxie Fab World.   Go check them out and you can play along too!


I love how she just happens to fit in the circle design so perfectly; like she's lounging around there.

I used the following supplies to make my card:
  • Kraft card base
  • Springtime papers from Echo Park
  • Black and white cardstock
  • Cheeky Rockabilly stamp from The Greeting Farm
  • Copic markers
  • Ribbon from the Animal Crackers Jack collection by Making Memories
  • Border punches from (top to bottom) Martha Stewart Crafts, EK Success, Martha Stewart Crafts, & Stampin' Up!
  • ATG adhesive, Scor-tape (for the bottom 2 borders), and foam pop dots
Shameless plug: the Echo Park papers, The Greeting Farm stamp, Copic markers, and all adhesives are available over at Cutters Creek!

Thanks for stopping by; I always love to read your comments!  If you feel so inclined, I would also love for you to become a follower (I also have email and reader options).

    Tuesday, May 24, 2011

    Tutorial Tuesday Preview - Faux Metal

    Welcome to Day #3 of Blog Candy Week!  If this is your first day here, be sure to visit this post for rules & ways to enter to win.

    Next week,  I am once again hosting Tutorial Tuesday over at Cutters Creek, but I just couldn't wait to share all of the results!  This month's focus is on embossing folders, so I am sharing one of my all-time  favorite embossing techniques: faux metal!  If you think you can make do with metallic cardstock or other ready-to-use products, think again.  This has the look of real metal, combined with the ease of use of cardstock; it's a win-win!

    You can visit the Cutters Creek blog next Tuesday for the full tutorial, but I got crazy and made three cards so I'm sharing the extra two here!

    First, here's this techy/manly gem using some silver Diamond Plate:

    This card is based on card sketch #5 from Sketch Support.  The card base is textured cardstock from my stash, all papers are from Cosmo Cricket's Cogsmo line, stamps & inks are from Close To My Heart, and Glam Rocks for the i-Rock from Imaginisce.  My borders were punched with a Martha Stewart punch.

    Next up, a classy & manly card:

    This card design is based on card sketch #3 from Sketch Support (I change the squares to circles).  My gold metal sheet is made using the Cuttlebug Clockworks embossing folder.  The card base is Desert Sand cardstock (CTMH) sprayed with Glimmer Mist.  Cardstock, stamps, & inks are from Close To My Heart; pattern papers are from Cosmo Cricket's Lil' Man line; gold brads are from my stash; phrase is from Making Memories; and all other metal embellishments are from Tim Holtz.

    I hope you enjoyed today's ideas - don't forget to see the full tutorial on the Cutters Creek blog next Tuesday!  And remember to stop back here the rest of this week for Blog Candy Week.

    Thursday, May 20, 2010

    And you thought YOU were behind!

    Ever feel like you'll never get "caught up" scrapbooking? I know it will never happen for me. I've decided that the process is more important for me - it's my creative release, after all. So I tend to scrap whatever I feel like at the moment.

    My oldest child just turned 9 last week, so I'm feeling a little sentimental. And to be truthful, longing a little for the good old days when she acted sweet and didn't sass back! So I've been scrapping photos of her from 2003. The terrible twos don't seem so terrible from this distance, and I feel like I still remember everything so well from 7 years ago.

    So here are the results of my recent efforts!
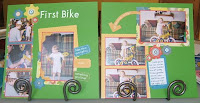
    As a bonus to delaying, I can wait until I have the perfect papers. I admit to having the entire Cogsmo line (Cosmo Cricket), but I never thought the colors were quite right for these pictures. I finally broke down and bought the Tinkerin' line from Close To My Heart, and the colors are awesome! I did add some Holiday Red CS because I wanted more of that color and it's not a main color in the kit.

    I added nothing else except an alphabet stamp set (Field Trip, CTMH), white pigment ink & embossing powder, and some foam adhesive tape. I used the foam tape to pop up some smaller gear Stickease on top of some larger ones. It's really a fabulous effect in person.

    The next layout is an Easter egg hunt, but I don't care for most Easter themed paper. I used CS from CTMH in Ocean (back side of textured), Topiary, Tulip, and Bamboo. All of the flowers and pretty embellishments are from a Making Memories embellishment kit I picked up at Tuesday Morning last year. I love using those cheap stickers to make a patterned paper; it's perfect for when you just need a little bit of pattern, and it matches your other embellishments perfectly!

    The final layout uses papers from Close To My Heart's new Splendor line. Right now I only have these two papers from a "sampler" type pack I bought to use for giveaways and make & takes. I love the bright fun colors in this kit so much, I can't wait to buy the full paper pack, the MyStickease, the matching Designer Brads, and the coordinating Over the Rainbow stamp set! Like everyone else, I need to budget my money and these are probably on the list for June.

    My favorite thing about Close To My Heart's papers is that every pattern is a B&T Duo - full color design on one side and monochromatic version on the back. That's why it looks like I have three patterns here instead of two. The Goldrush pattern on the top strip is actually the back side of the floral pattern on the right page. Double duty supplies make things so much more versatile!

    My embellishments on this page are just some flowers cut from the patterned paper, with some Orange Marmalade Stickles added to the centers. I used the Field Trip alphabet again, as well as a "friends" cut from the Walk In My Garden cartridge for the Cricut applied directly on top of my photo.

    Now go find some of your favorite old photos and scrap!

    Thursday, September 3, 2009

    Christmas Cards All Year 'Round monthly challenge

    One of the funnest blogs I follow is Christmas Cards All Year 'Round. Each month, you need to make 5 Christmas cards that follow the theme/challenge for that month. Now normally I'm not very quick with these, but this month was especially easy: make any 5 Christmas cards, no restrictions. I was in a crafty mood, so over the last couple of days I've actually managed to finish my 5 cards for September ALREADY!

    To make it more fun, I made all 5 cards with different supplies and played around with things a bit. Here's what I came up with:

    The first card has a vintage, Victorian feel. The card base is from Hobby Lobby, and all other products are from Close To My Heart.

    I stamped my image with Timber Brown Staz-on on white CS, and colored in using both markers and a water brush with ink pads. Image is popped up on adhesive squares.


    Supplies used for the card to the right include a card base from Hobby Lobby; CS, ribbon, ink pads & gold EP from Close To My Heart, and stamps from Club Scrap.

    I went with a simple design on this one, highlighting my main image by running my pigment ink pad along the edges and heat embossing with gold EP.


    To the left is another vintage style card, this one uses large chipboard corners from Daisy D's, along with CS, hemp, stamp, & ink from CTMH. Eyelets are source unknown.


    To the right is a fun little card, using Bazzil CS and Making Memories pattern paper. Stamps, ink, and ribbon are CTMH, and deckle edge square punch is from McGill.


    I made this final card just so I could play with certain items! Other than the star button and the Stickles on said button, all supplies are from CTMH.

    The presents along the bottom are actually from a border stamp, which I stamped in the three different colors and cut apart.

    On the felt tree, I embossed with white EP to make it look snowy. (Not exactly how I wanted it too turn out, but EP sticks to felt like crazy!) I also used round clear Sparkles on my tree, and sponged around the edge of the entire card for definition.

    Want in on the fun? Go visit "Christmas Cards..." and challenge yourself this month!
    Related Posts Plugin for WordPress, Blogger...