Tuesday, September 1, 2015

Paper Garden - September Stamp Of The Month

Hello and welcome to this month's stamp of the month blog hop! I am super excited to share my project with you this month, and practically all you need to make it is cardstock and ink.

First, a little housekeeping: if you've arrived here from Michelle's Handmade World  blog, or if you're just starting out, you're in the right place. Just keep hopping along until you end up back where you started!  This month's stamp set has 10 floral images, perfect for everything from sympathy to celebrations. You can get yours for only $5 with any $50 purchase this month.

I decided to make a two-page layout for this month's project, and I must say that I am in love with the results:


I used colors perfect for a country Fall, and I'm really looking forward to getting some pictures taken for this layout.  I designed this from scratch, so I thought I'd share my process with you. I started by choosing colors, which can be a challenge when you don't have specific pictures in mind. Since the first thing I thought of with these stamps was a country evening, I decided to use Sapphire for the night sky and Ruby for a red barn. I added Fern for the darkening evening's grass, and Safflower for a harvest moon.


One of my favorite things is a big circle crossing both pages of a layout, and strips across the pages to ground everything. I embossed the Ruby strips with the Woodgrain embossing folder, and I stamped the flower silhouette stamps on the Fern strips.  I added a few well-placed stems on the Sapphire base pages, and I random stamped the Safflower circle with individual images from the set.  I added a Peacock banner strip and a thin banner strip of the lightest Brown & Tan Glitter Paper.


Next I cut out several photo mats, and played around with the arrangement until I found what I liked. I ended up covering more of the circle than I planned, but I liked this layout the best.


I cut several flowers and leaves using the coordinating Artiste Cricut cartridge, and also decided to cut some of the leaves from more of the Glitter Paper.


 I added some natural looking dimension to the flowers and stamped leaves by rolling an embossing stylus around the center, then each petal.


I embossed a couple of the leaves from the back side so they curled the other way. I added some 3-D Foam Tape under those, to keep their shape in the protectors.


For the flower centers, I used Durables Artisan Studs for the large flowers, and the Bling Gems Gold Assortment for the smaller flowers.

So, what do you think? Are you ready to make your own layout now?  If you need to shop, a clickable photo list is below. Links open in a new tab so you can continue the hop from here without getting lost.  When you're done here, let's head over to Jacquelin Green's Paper Goodness blog to check out her project this month. I can't wait to see it!

Products used in this project:

September SOTM
Enchantment CS Combo (or individual colors)
Stamp Pads in coordinating colors
Stamping Blocks
Woodgrain Embossing Folder
Artiste Cricut cartridge
Brown & Tan Glitter Paper
Piercing & Embossing Tool Kit
Bling Gems Gold Assortment
Durables Artisan Studs
3-D Foam Tape


Monday, August 31, 2015

16 Page Daytrip Scrapbook with Seaside - The Final Installment

I'm so sorry for the late post! I plum forgot to post this yesterday when I had planned.  Just want to share the last four pages of this fun themed album with you.


Just a simple design here with a large panel on the left and a solid "base" across both pages.  Easy to add 4x6 photos, as well as a few 2x2 closeups.


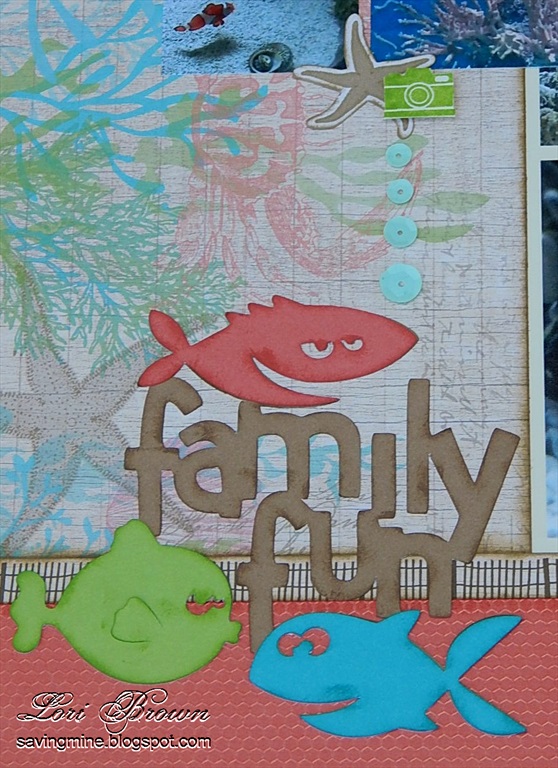
This fun title was cut to match using the Life Is A Beach Cricut cartridge and cardstock.


Another simple design using strips of paper. The outer corners are rounded, making it feel more like a single mat.

 I curved part of the title around the corner of a picture, mimicking the rounded corners of paper.

I hope you enjoyed this little series! What theme album would you make like this?

Most of these products I used are discontinued as of September 1, but if you are interested in ordering just contact me directly. I do have a few days grace period to get things as long as they are still available.  You can see everything I used in my previous posts.

Thursday, August 27, 2015

16 Page Daytrip Scrapbook with Seaside - Part 4

I'm back today with part 4 of my daytrip album.  Before I get on with the pictures and info, I want to make sure that you know that some of these items get discontinued  in just a few days. The Seaside Workshop on the Go will be leaving, and the Paper Fundamentals are changing from the current geometric patterns to a more doodle-like look.  Be sure to order ASAP if you want either of these items!

Here is today's first layout:


Seriously, is there anything cuter than penguins? I found a fun way to add more pattern to this layout using just cardstock. I cut a full size overlay using the Cricut Artbooking cartridge, and turned it upside down from the way it's shown in the handbook so it looks like waves. I also added some ink distressing in Desert Sand, to tone down the Lagoon a bit and tie it in with the papers from the kit some more.


I made the fun title with the Keyboard Alphabet stamps and patterned paper letters cut using the Artiste Cricut cartridge.


The paper strips make a nice  base for the photos to "sit" on. I cut the border embellishments from the same pattern paper as the title letters, using the Artistry Cricut cartridge.  I added a few sequins for interest.


Here's a great way to use large photos and keep your layout balanced. This sketch from Scrapbook Generation uses a large panel and connected strips across the bottom to add weight to the single picture and really place the focus there. It nicely balances the simple grouping of photos on the opposite corner of the layout.


I used the Paper Fundamentals for a subtle pattern on the large panel - it pairs nicely with the multi-color pattern on the strips. The title uses only a portion of a stamp image from the kit, as well as the Keyboard Alphabet again. A grouping of sequins again adds some interest.


More stickers from the Complements, plus a few embellishments, make a fun little scene below the focal point photo.

Only 4 more pages left to share - be sure to come back and check it out! Here's a handy list of the products I used for the whole album:

Seaside Workshop on the Go
August 2015 SOTM
Paper Fundamentals - Adventure (Pear)
Paper Fundamentals - Whimsy (Sorbet, Glacier)
CS in Glacier, Colonial White, Sorbet, Pear, Hollyhock, Lagoon, and Desert Sand

Ink Pads in coordinating colors
Sponge Daubers
Assorted Adhesive Sequins
Aqua Dots
Durables Artisan Studs
Coral Shimmer Trim - backorder until 8/21
Keyboard Uppercase stamp set
Cricut Collections
Flip Flaps

Tuesday, August 25, 2015

16 Page Daytrip Scrapbook with Seaside - Part 3

Hello and welcome back for part 3 of my daytrip album! Today I'm going to share two more 2-page layouts with some tips for tying things together. The first one has my favorite pictures from our day out:


I used a sketch from Scrapbook Generation with one of my favorite design ideas - that big main panel that stretches across the center seam. It's a great way to use a paper with a large design so it doesn't overwhelm the photos. Since most of it is hidden behind the photos, you get a perfect taste of it.  Also notice that I used Hollyhock (pink) cardstock for my page bases this time. It's a minor color in the paper pack, but really enhances those jellyfish pics!

I did alter the sketch slightly to give all of those strips some banner ends. It's just a little more interesting than straight edges here and gives some more sense of movement.


Even thought the pictures are only jellyfish, I made all of my embellishments a general sea theme. It coordinates more with the papers, and it ties them in to their natural environment as opposed to the aquarium.


All of my shapes are cut from the Artistry Cricut cartridge. I used the Artisan Studs for eyes so the metal would tie in with the metal embellishments in the Seaside Collection.


This cool octopus and stamped sentiment make a third embellishment for a visual triangle on the layout.


Here's another layout based on a sketch! Instead of a large circle shown in the sketch, I cut a fun sun shape with the Cricut.


More fun ideas for replacing plain strips of paper in a sketch - angled cuts and borders cut or punched are a fun alternative. I also made a title grouping using a variety of stickers from the Seaside Complements. 

Another little grouping of embellishments using stickers, stamps, and more.

And the third grouping to finish the visual triangle - the design nerd in me just loves this stuff!

I hope you enjoyed today's post - I'd love to hear what you think before you leave! Here's another reminder of the products I used for this entire album:

Seaside Workshop on the Go
August 2015 SOTM
Paper Fundamentals - Adventure (Pear)
Paper Fundamentals - Whimsy (Sorbet, Glacier)
CS in Glacier, Colonial White, Sorbet, Pear, Hollyhock, Lagoon, and Desert Sand

Ink Pads in coordinating colors
Sponge Daubers
Assorted Adhesive Sequins
Aqua Dots
Durables Artisan Studs
Coral Shimmer Trim - backorder until 8/21
Keyboard Uppercase stamp set
Cricut Collections
Flip Flaps


Related Posts Plugin for WordPress, Blogger...