- Clear embossing ink and clear embossing powder
- Heat tool
- Glossy Accents
- Stamping Ink
- Pigma Micron Pens in black
Clear embossing ink & powder is an indispensible combo. You can use them alone on colored cardstock for a great tone-on-tone effect. Or, try this idea: stamp a background stamp with clear embossing ink on white (or light colored) cardstock and coat with clear embossing powder, then heat with a heat tool. (By the way, that heat tool also comes in very handy when you need to dry things quickly - Glimmer Mist, even some kinds of Stickles.)
Next, use your stamping ink to color the background. You can use your choice of applicator tools, or even direct-to-paper. I used a brayer on this piece; I also chose to use textured cardstock here for a fabric-like appearance. Wipe off excess ink using a tissue, then trim the panel to your chosen size.
That stamping ink comes in handy for all kinds of things, and many of them don't involve a stamp at all. I used mine to color part of some Petaloo Color Me Crazy flowers, as well as edging a ribbon slide sentiment label for added definition. Ink also adds some awesome dimension to your die cuts when you sponge all the edges with coordinating ink.
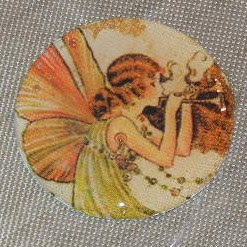
Glossy Accents serves two functions on my craft table. It makes an awesome adhesive when you're adhering something odd shaped, or with uneven texture, or something you need to be able to move around a little before it's permanent. And the most fun use is to make your own epoxy stickers. For this project, I fussy-punched a circle from some fairy paper, outlined it with Glossy Accents, then filled it in. Any air bubbles can be popped with a pin before it dries, if you choose. This technique does involve drying time (sorry, the heat tool won't work here), and the thicker the gloss the longer it will take to dry.
 |
| The wet Glossy Accents will look milky. |
 | |||
| Dry Glossy Accents will be shiny and dimensional. |
Finally, the Pigma Micron pens are perfect for adding all kinds of details. I love the set of three, since the different line widths can give a different feeling on your projects. They dry quickly and won't smudge, so I love to use them when I need to hand write all or part of my sentiment. Another alternative is decorative pen work, such as doodling some flourishes. Or, as I did, adding drawn stitching. To make it more realistic looking I punched holes first, using a paper piercer and my Tim Holtz ruler.
With these few basic supplies, you can create all kinds of different designs. Simply change your stamps, paper color, and/or ink color for a completely different look in a short period of time!
FYI, for those who are interested: the background stamp is from Cornish Heritage Farms and the sentiment stamp is from Close To My Heart. The ribbon slide label was cut using Make The Cut software.C


Wow what a gorgeous center to your flower. Thank you for entering the Petaloo’s Color me Crazy Challenge. Your entry is just lovely. We will be emailing the winners & runner-ups on Wednesday July 27th ! And don’t forget to visit our Petaloo Youtube channel and website gallery for more ideas and inspiration. Good luck!
ReplyDeletePriscilla :)
http://petaloo.typepad.com
Petaloo Products
Priscilla@petaloo.com