
I left my base plain as it came since it matched my papers, but you could easily paint it. The drawers are large enough to hold a small treat for each of my (three) kids, and I plan to put slips of paper inside some with an activity for that day (great for weekends!).

Because the joinery shows when assembled, I covered the top and sides. I chose an allover small print because it's larger than 12" and needs to be pieced. I used a zip strip from one of my papers along the center of the top, but it would look fine plain also.

I chose to cover the front and sides of each box with a variety of the papers & cardstocks in the Pear & Partidge paper pack. I distressed all of the edges using the distressing tool that looks a bit like an emery board. I also inked and gold embossed all of the edges & corners of the base boxes for bling.

I decorated the box fronts with an assortment of embellishments and the November stamp of the month set, Capture The Date. I like that is has several sizes/styles of numbers so I could use different ones depending on how much room I had. (Sorry, the red velvet rub-ons I used are no longer available, except as part of Hostess Collection 4, while supplies last.)

This box is the easiest possible! I just used one of the Dimensional Elements In Color and stamped a "3" on it. Super quick!

This one uses a couple of rub-ons for the leaves; all of the other items are from the Antiqued Gold Mini-Medley Accents Collection.

This is another from the Pear & Partridge Glittery Rub-Ons. I added a little extra glitter with some Pink Glitz glitter gel on the berries. These are super easy to put on using the Rub-On Tool.
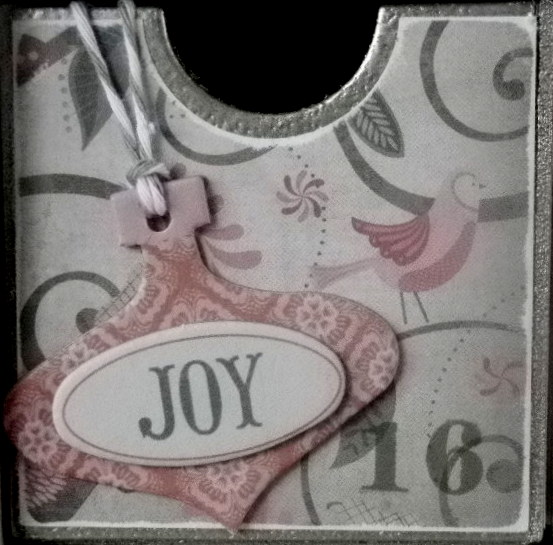
This is another of the Dimensional Elements In Color. I punched a hole in the top of the ornament and added some twine for a hanger. I adhered the twine to the inside of the box using some Liquid Glass.

Finally, this set of three uses one larger rub-on. They can easily be cut apart and applied across multiple items. Or, the rub-ons can also be layered on top of each other for dimension, like a bird overlapping part of a snowflake.
I hope you enjoyed this fun project! I would love to hear your comments on it. If you're inspired to make one of your own, here is a list of products I used:
- Kaisercraft Mini Treasure Chest
- Capture the Date, November 2012 stamp of the month
- Pear & Partridge paper pack*
- Pear & Partridge Complements Glittery Rub-Ons*
- Festive Velvet Rub-Ons (not available individually)*
- Dimensional Elements In Color - Holiday *
- Mini-Medley Accent Collection, Antique Gold
- Baker's Twine Harvest Assortment*
- Liquid Glass
- Sanding Kit
- Gold Embossing Powder
- Versamark Ink Pad (or use pigment ink)
- Rub-On Tool
- Exclusive Inks stamp pad in Cranberry, Olive, & Cocoa
- Sparkles in Clear Assortment and Red, Pink, & Purple Assortment
- Glitz glitter gel in Pink, Green, & Almond

Lori, this turned out FANTASTIC!!!! Great job!
ReplyDeleteLori, it is beautiful. A different version from the one I did. Glad you were able to get it put together.
ReplyDeleteIt is beautiful!!
ReplyDeleteThis is really gorgeous!
ReplyDeleteYour Advent calendar turned out great!
ReplyDelete