Monday, March 31, 2014

Balloon Talk - April Stamp of the Month Blog Hop

Hello and welcome to the April stamp of the month blog hop! (If you are looking for the Perfect Paper Crafting blog hop, please click here.)  If you've arrived here from Priscilla's Paperie, or if you're just starting out, you're in the right place. If you get lost anywhere along the way, I have the full list posted here.

The stamp of the month for April is Balloon Talk, a fun & trendy set of 24 stamps. I have no problem admitting that I was a little stumped by what to do with this stamp set when I first opened it - it's not exactly my usual style. But then my friend Mr. Mustache came to the rescue...


I was inspired by one of the corporate artwork pieces shown in the catalog to create the mod background. And I used the current CAS(E) this Sketch for the basic design.  Then I cut Mr. Mustache from the Artiste Cricut cartridge at 3/4" and popped him up on some 3-D foam tape front & center. He's always the perfect guy to deliver a fun message!

I used out Mini Pigment Inks in Honey, Cotton Candy, Lagoon, and Black for all of the background stamping, and to edge the square of Honey cardstock.  I was going to stamp the sentiment in pigment ink on Black cardstock, but this nasty cold I can't shake has apparently affected the crafting part of my brain somewhat because I just couldn't get it. So I used Lagoon dye-based ink on White Daisy cardstock instead. Maybe tomorrow...


 But for now, Mr. Mustache and I would like to say thanks {big time} for stopping by! Be sure to leave me a little comment before you go, then let's head over to the Inky Scrapper and see what Haley has in store for us this month.

If you're ready to shop, here's a list of supplies I used:

Girls Night Invite - Made Simple With Perfect Layers Mini

Hello there, and welcome to the Perfect Paper Crafting Brand Ambassadors blog hop! For today's hop, Brand Ambassadors like me will be sharing projects made with the awesome new Perfect Layers Mini tool set.  This is a perfect product for people like me who are a little anal retentive exacting, and need things to be just perfect.

Along the way, you can also play for one of two awesome prizes! You have the chance to win either a $50 gift certificate to the Perfect Paper Crafting online store, or a $25 gift certificate to Sugar Pea Designs online stamp store. To be eligible, just be sure to leave a comment on all of the participating blogs. You have until Midnight PST this Friday (April 4) to leave your comments, and winners will be announced on Sunday April 6.

Now, on to my project:


Now, who couldn't use a girls night out? And this classy little invite couldn't be easier to make, thanks to the Perfect Layers Mini set! I used some inchies stamps that I've had for some time, and stamped them in black pigment ink on white cardstock.  After drying, I trimmed them out and adhered them to some Lagoon cardstock (CTMH). Using the Perfect Layers Mini set and my X-acto knife, I trimmed them with a 1/16" border.  I then adhered them to Black cardstock (CTMH) and added an additional 3/16" border.


Next, to put both pieces on a single mat, I adhered them to a piece of Gypsy cardstock (CTMH) using the grid on the Perfect Cutting Mat to eyeball a 1/4" distance between them. I then used the Perfect Layers Mini to trim a 1/4" border all around.

I cut a 3" x 5 1/2" center panel (Laughing Lola from CTMH) and mounted it on a Lagoon cardstock scrap 5 1/2" wide. I used the Perfect Layers Mini to add 1/2" borders on each side, and adhered the whole thing to a 4 1/4" x 5 1/2" card base.


I added some Black Shimmer Trim and resin flower (both CTMH) for a little interest. Now, to make some clones of it, and I'm all ready to start planning my next girls night out! Don't forget, if you decide to go shopping be sure to use the code LoriB5% at checkout to save 5% on your purchase.


Thanks so much for joining our blog hop today! Don't forget to leave a comment before you go for your chance to win one of those great prizes.  Here's a list of all our participating blogs:

Perfect Paper Crafting & Laura Lynn http://blog.perfectpapercrafting.com
Wendy Ramlakhan http://sugarpeadesigns.com/blog/

Susie Moore www.thedieshaveit.com
Kim O'Connell http://www.kimoconnell.com 
Lori Brown ---YOU ARE HERE---
Kat Ancheta http://creat-w-kat.com 

Wednesday, March 26, 2014

Quick Custom Pendants

So, since yesterday's card was on the time-consuming end of the crafting spectrum, I thought I would share something quick & easy for today!  I fell in love with some sweet DIY pendants at a craft expo last Fall, and as luck would have it, Close To My Heart introduced the SAME pendants in the Spring/Summer Idea Book. It's like they are reading my mind!

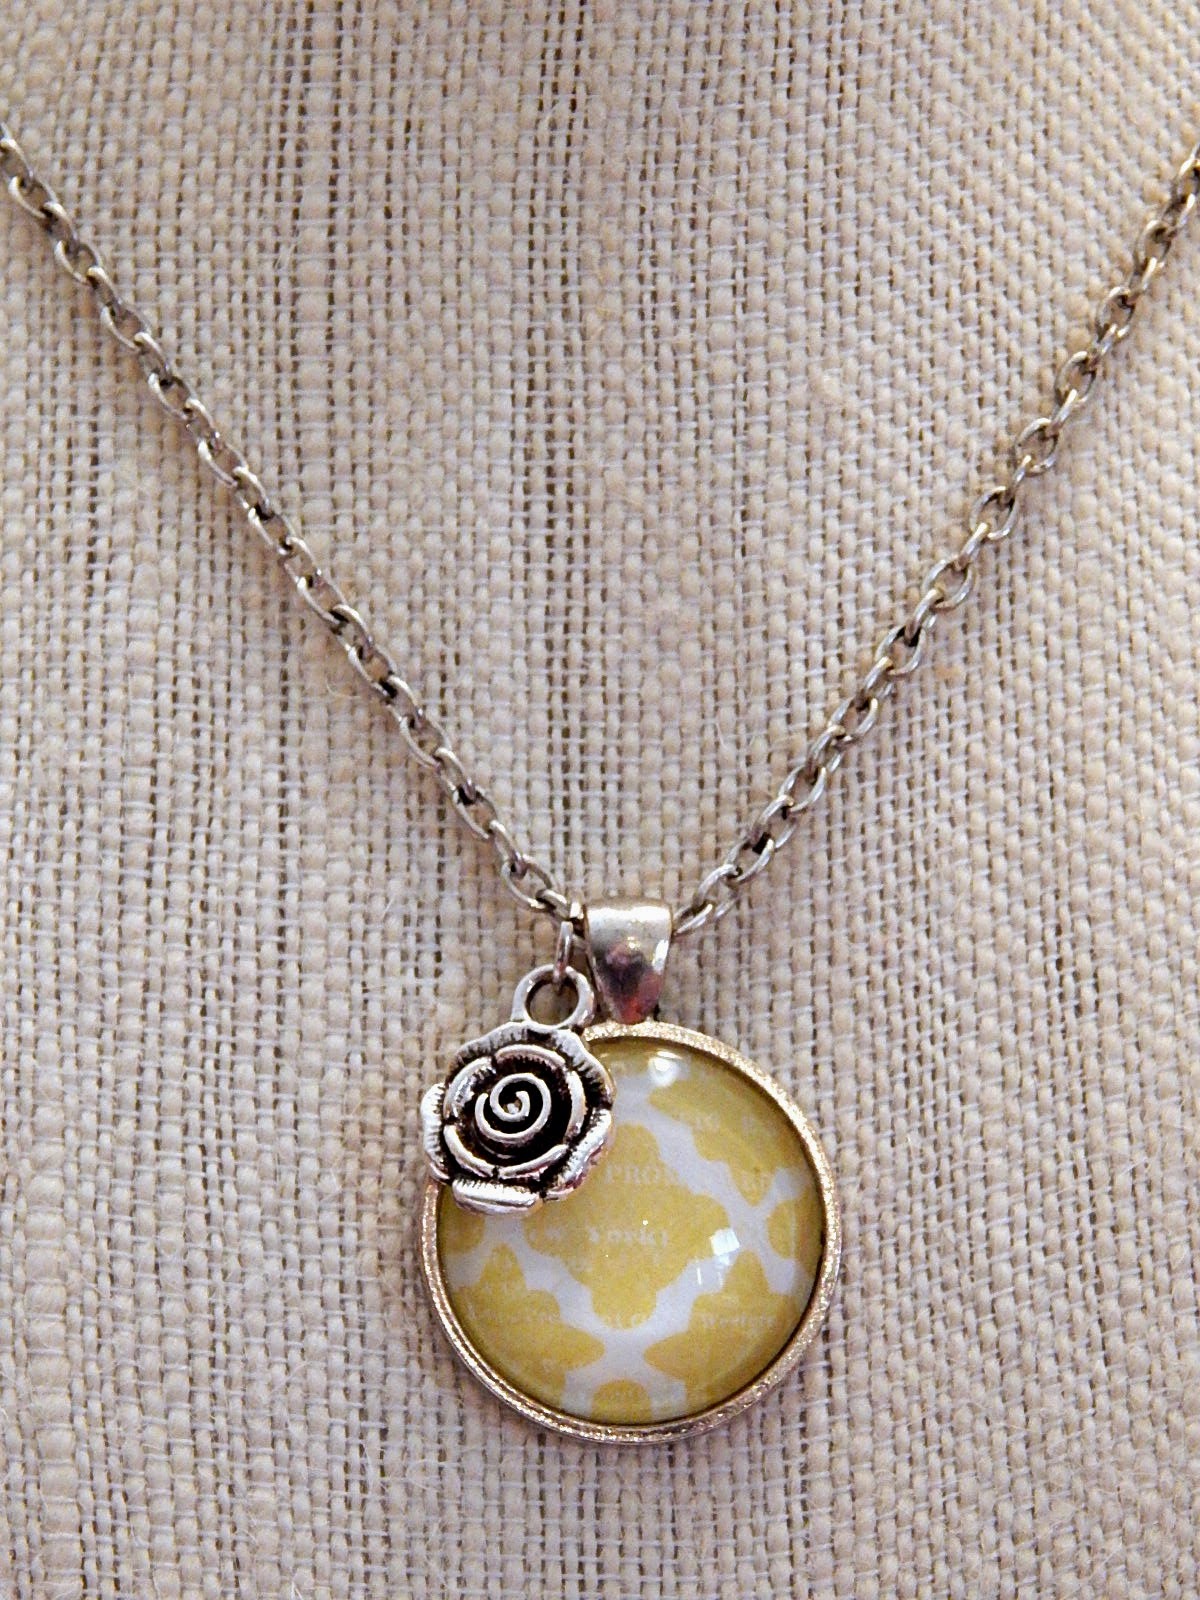
These pendants literally take less than 2 minutes to put together - the only hard part is deciding what to put in them!  So here are a few that I have made:


This is nothing more than patterned paper! I used a 1" punch for the circle, and used Liquid Glass to adhere it into the pendant and to adhere the glass dome. I used a baby wipe to clean off any extra adhesive that oozed out, and BOOM! Done! (Of course, I would recommend waiting at least 15 minutes for the adhesive to dry properly before trying to wear it, but seriously, less than 2 minutes start to finish.)


Again, just patterned paper. I added a charm from the Free Thinker packet, and that was it. This will be one of the door prizes at our local Woman's Club Flower Show tomorrow night; I'm sure the winner will love it!


And finally, this is one I made for myself since I am the queen of all things crafty!  For this one, I used an adhesive image from the Craft Queen Style Sheet. I also used some little jewelry pliers to open the jump rings on my charms and attach them to the chain in fixed positions instead of just sliding them on.

Aren't these such a fun and quick project?!  With the great prices, I think they would even be a fun craft for an older girl's birthday party. And of course, what a great project for a grownup Girls Night Out! Some of my fellow consultants have even used photos in theirs for a very special memento - something I would like to try soon.

Pendants are available in circles and squares, and everything comes in Faux Antiqued Gold and Faux Antiqued Silver finishes. You can check out the entire line of Base & Bling Wearable Crafts on my website, but here are the specific items available for these great necklaces.

I would love to hear what you think of these - is this something you would try?

Tuesday, March 25, 2014

A Country Card - and Some Challenges

After a yucky day of feeling sick yesterday, I really needed a crafty day today!  I thought I would stick to a smaller project, so I made a card for some of my favorite challenges.


I've had this sweet watering can stamp for a while and hadn't used it yet so I pulled it out, along with the coordinating die.  I thought it would work really well with these papers for the Country Flair challenge over at Heart 2 Heart Challenges this week. I always prefer working with a sketch, and definitely didn't want make my own today, so I went with my old standby of Mojo Monday. I wasn't sure at first how this week's sketch would work for this card, but can I just say that I LOVE it?! I'm also going to join in on the Anniversary Challenge at Our Daily Bread Designs; you just have to use ODBD stamps.


I used papers from the Jubilee paper pack from Close To My Heart, some woodgrain washi tape from CTMH, and a purple floral washi tape (that I think is from Love My Tapes).  I used a Spellbinders round die for my circle, sponging some Cashmere ink (CTMH) inside for added depth.


The Watering Can stamp and coordinating die are from Our Daily Bread Designs. The image is stamped in Memento Rich Cocoa ink, then die cut with the matching die. I colored the image using Copic markers. Here is a list of the colors I used:

  • E07, E08, E09 (can)
  • YG61, YG63, YG67
  • BV02, BV04, BV08
  • Y11, Y13, Y15
  • R22, R24, R27
  • YR04, YR07, YR27

Monday, March 17, 2014

Merci - a Spring Thank You Card

I've been planning all weekend instead of playing ("power sorting" layout materials for a crop next weekend), so I decided to play along with a couple of my favorite challenges this week with this card:


I loved this week's simple Mojo Monday sketch, and I matched it up with a Pantone color challenge over at Heart 2 Heart

I chose to use Gypsy, Honey, Juniper Ponderosa Pine, and Champagne from the color challenge options. I paired them with the A Mother's Love stamp set and an old thank you stamp from my stash.  I used a combination of good old-fashioned Post It masking along with some fussy cutting for a few of the leaves.

I hope you like today's card, and I hope you find some time to go play in one or both of these great challenges this week!

Supplies used:
  • A Mother's Love stamp set - this is a Hostess Exclusive, but it's easy to earn so feel free to ask.
  • Exclusive Ink stamp pads in Champagne, Gypsy, Honey, Juniper, and Ponderosa Pine
  • Cardstock in Gypsy and Kraft
  • pattern paper is discontinued CTMH
  • small scallop circle punch from Fiskars

Saturday, March 15, 2014

Luck of the Irish Blog Hop

Are you looking for a pot of gold at the end of the rainbow? Well, you’re in luck at this blog hop! We’ve got great projects from very creative designers today! So if you started at Janet's Creative World, then you’re in the right place. If not, please make sure you stop at all the blogs and leave a comment. Janet is giving away a Close To My Heart Cloud Nine Cardmaking kit valued at $45.00. (See a picture at the end of my post or on Janet's blog.) How’s that for blog candy?!

And now, on to my project:


Now while this may look like a card (and does happen to be 5"x7" size), this is NOT A CARD - it's a decor item!  I like that it goes flat for storage because I have enough holiday stuff taking up storage space as it is!

I started by creating the main background panel. I cut white cardstock to 4.75"x6.75" and random stamped the entire piece.  I used the Multi Step Shamrocks & Clover stamp set from Kitchen Sink Stamps with Exclusive Inks stamp pads in Sweet Leaf, Topiary, and Ponderosa Pine from Close To My Heart.  After stamping, I used a Sponge Dauber and the Sweet Leaf ink to edge the entire piece. I then adhered it to a piece of Topiary cardstock and trimmed it to a 1/8" border all around using the new Perfect Layers Mini and an X-acto knife on the Perfect Cutting Mat.


Next, I cut this white center panel to 3"x4" and stamped my sentiment in Topiary ink. The sentiment is a discontinued stamp from River City Rubber Works called May the Road Rise. If you can't find a similar stamp, you could always print the saying from your computer.  I again used the Sponge Dauber with Sweet Leaf ink along all of the edges. Using Liquid Glass, I adhered this panel to a scrap of Tan Glitter Paper from Close To My Heart (looks gold to me!). Once dry, I again used the Perfect Layers Mini to mat it at 3/16" on all sides. I then adhered that to a scrap of Ponderosa Pine cardstock and trimmed that at 1/16" on all sides. I adhered this entire piece to the main panel, centering it side to side and about the same distance from the top.


The next step was to create an easel so my piece would stand easily.  I cut this using the Fancy Frames cartridge with my Cricut, set at 6.5".  I still trimmed a tiny bit from one side, as it cut slightly wider than my piece and I did not want to make the backing any shorter. I adhered it to the back of my piece with adhesive on the top and both sides only.


Finally, I got to the fun part: adding all the "stuff"! First I made a double bow with a Bow Easy tool.  I adhered a length of ribbon across the front of the card using Scor Tape, and adhered the bow to the ribbon with a Glue Dot. Next, I pulled out my Epiphany Crafts Shape Studio Tool Heart 25 and Bubble Caps.  I created a shamrock shape by making 3 hearts from a scrap of paper from the Jubilee paper pack from Close To My Heart. I adhered that slightly behind the bow, using 3-D foam tape to pop it up.  Then I pulled out a big pile of small paper and plastic flowers from my stash of neutral colored flat flowers and assembled these using some mini and small green brads from my stash. I adhered them all around the shamrock and bow using some more Glue Dots. Finally, I stuck in a few Making Memories stick pins in green and I was done!


I really love the way this project turned out, and I hope you do too! I'm also linking this project up to the "Feeling Lucky" challenge over at Heart 2 Heart Challenges - be sure to check it out.

Now do an Irish jig over to Alicia's blog and see what she has in store for us - I can't wait to see!

Here’s the line-up should you get distracted by other Leprechaun trying to trick you! Thanks for joining us today and be sure to wear green March 17th so you don’t get pinched!!

Line-up

Don't forget to visit and comment on ALL the blogs for a chance to win this great prize from Janet. Now there’s some gold you’ll want to have a chance on!
DSC04246

Tuesday, March 11, 2014

Carrot Patch - Creations by AR March New Release

Hello again, and welcome to the March new release blog hop for Creations by AR! Adela has created more beautiful templates for us this month, and as usual you have the chance to win one of the templates for yourself. As always, the templates are available in SVG, Silhouette Studio, and PDF files (for those who cut by hand). I cut mine using the SVGs and Make The Cut software with my Silhouette Cameo; I find the MTC software easier to use than the Silhouette software.

This month we are featuring the new Carrot Patch  and Standing Cross templates. Our winner will be able to choose the one they would like the most. So, how do you qualify to win, you ask? It's easy, just leave comments:
Comments will be accepted until 12 noon Eastern time on Friday, March 14, 2014.  One random winner will be announced March 15 here:
AR FB: https://www.facebook.com/pages/Creations-by-AR/154314751303824
AR Website: http://creationsbyar.com

 For today I chose to feature the Carrot Patch template. I started the cross too, but have not had time to decorate it as nicely as I would like, so I will post that in the next day or so.


I opted for a playful look to my carrot patch, using patterned papers for almost everything. They are all from the Country Drive collection from Echo Park Paper.  I inked all of my paper edges using coordinating inks (from Close To My Heart), and giving a little age to my white picket fence.  "Happy Easter" is from a Hostess Exclusive stamp set from CTMH. The paper flowers and rhinestones are all from my dragon hoard of embellishments. I think I may have to add more and go all the way around!


These little carrots are so cute all tied up with baker's twine! Their small size will be just perfect for a little "hunt" I have mind.  My son is disappointed that we will be missing the Easter egg hunt at Grandma & Grandpa's house again this year, because my sister puts coins in some of the eggs. So I thought we could roll up some paper money and let each kid find enough carrots to fill their basket. Perfect, since we will probably be in a hotel on vacation again this year!


I can't wait to make more of these fun little Easter goodies! That is, AFTER I get that cross decorated of course...

Be sure to visit the rest of the Design Team blogs and comment for your chance to win:

Tuesday, March 4, 2014

Bunny Love - Mojo Monday 335

I'm joining up to Mojo Monday today with this sweet Easter card. I really love this week's MM sketch and had lots of ideas but finally decided on this one:


I stamped the sweet line-drawn images with Chocolate ink and left it at that. I love the way it reminds me of old story book drawings. I combined papers from three different paper lines, and sponged all of the edges with coordinating inks. I added a sparkle flourish and some paper flowers and done.  The darker of the blue flowers is from Kaisercraft. The other two are assembled from flat flowers from my stash.  I am also linking this card up to this week's Triple Play challenge - to use three of something (my three different paper lines!) at Heart 2 Heart Challenges.

 
Be sure to go check out this week's sketch at Mojo Monday and play along! If you're interested in any of the products I used, here are the details:


Monday, March 3, 2014

Smile & Be You - Scrapbook Generation Blog Hop

Hello and welcome to the March Scrapbook Generation blog hop! This is my first time participating in this hop & I can't wait to see what everyone has done. Be sure to visit and comment on every blog in the hop for your chance to win - read on after my project for details.

I chose a sketch from Sketches for Scrapbooking volume 8, designed for 13 photos, and here's what I did with it:


I stayed very close to the sketch for this layout, really only changing the title area and journaling area a little. And no, my son wasn't too pleased with the flowery paper, but I think it looks great so tough nuts to him!


The sketch called for a die-cut paper where I used the floral, and instead of adding to an already busy pattern, I used a border punch for a little added interest. The title and embellishments are all chipboard pieces, some popped up on foam tape to add even more dimension.


For even more added dimension, I inked the edges of every piece of paper and chipboard with coordinating ink and sponge daubers. If you want exact product details, they are at the end of my post.

You can find the SG sketches in their books and as downloads in the SG store, and there is a free one every month in case you wanted to try it out.

Next on the hop is Mandi; leave a comment on each blog and one lucky commenter will receive a free sketch bundle of their choice from the store. The winner will be drawn on Monday, March 10th, so you have one week to leave a comment.

In case you get lost at any point, here is the list of all the blogs
Scrapbook Generation blog - http://scrapbookgeneration.blogspot.com/
Ruth - http://scrapmachine.com/
Louise- http://madeatnumber27.blogspot.com.au/
Tina Gale - http://tiggersscrapplace.blogspot.com
Steffanie - http://steffanies.blogspot.com/
Devra - http://mycreativeview.blogspot.com/
Melissa - http://www.scrappyjedi.com
Lori -  YOU ARE HERE!

Mandi - http://www.mjskraze.blogspot.com/
Lori S - http://loriannie670.blogspot.com
Cassie - http://allsmilesandsunshine.blogspot.com/
Katy - http://www.scrappinkaty.blogspot.com
Stephanie - http://craftyholidaygirl.blogspot.com
Isbaha - http://isbahashome.blogspot.com
Corrina - http://anotherthingoffthelist.blogspot.ca


Products used in my project:
  • Ariana paper pack and complements - Close to My Heart
  • Exclusive Inks stamp pads in Smoothie, Slate, Outdoor Denim, Crystal Blue, and Sweet Leaf - Close To My Heart
  • Sponge Daubers, Tsukineko (available from CTMH) 
  • 3-D Foam Tape
  • Parisian Edger Punch, EK Success (I believe this is discontinued but a quick Google search will bring up several available for purchase.)

Related Posts Plugin for WordPress, Blogger...