Thursday, June 30, 2011

Get Out of the Box!

Hello and welcome to July's stamp of the month blog hop!  This month we have over 60 consultants sharing their ideas with us, and I hope you'll visit as many as possible.   If you're coming here from Shirley's Mom N Me Scrap blog, you're in the right place.  When you're done here, you'll head over to Vicki's Wizard's Hangout for what I'm sure will be a spectacular project.

This month's stamp set contains 12 images that are perfect for Independence Day, but also for so much more.  I want to get you out of your box with this stamp set!  Some of these images would be great for birthdays as well, but I chose to use the set for a soccer layout.  Even using the Fanfare paper pack, with its stars and patriotic color scheme, these pages are decidedly sporty.

Quick Note: I used Make The Cut software with my cutting machine to cut my title, but you can easily substitute the stamp font of your choice.

Here's the entire layout (click on the pic to see it larger!):
Not what you would expect from this stamp set, is it?  That's the nice thing about stamps; we can use them in unexpected ways with great results.  Let me show you a few detail shots for some out of the box thinking and some other little tips.

Here I used a stamped image to reinforce and highlight part of my title.  I also pulled in multiple colors by inking up my stamp with a lighter color (Sky), then inked the edges in a darker color (Pacifica), using just the edge of the ink pad.  After stamping, I hand cut the general star shape then swiped a third color (Sunny Yellow) along the edges.

Add dimension to your stamped images with foam tape.  Here, I stamped a second image, punched it out, and popped it up in the center of the first.  Also, see how I let my star go right off the edge?  Always works when your space is just not quite large enough to get the whole thing in; just snip off the extra from the back side.  Oh!  Like my borders?  Those are the Kraft Color-Ready Borders - I actually colored them for a change, using an Archival Black stamp pad for the blackest black.

Lastly, use embellishments to replace tiny portions of stamped images.  I stamped this image in Sunny Yellow on White Daisy CS, and just cut out the larger stars.  Following the design of the entire image, I replaced the smaller stars with Opaques Pearl Adhesive Gems, and the dots with Bitty Sparkles.  And a final tip: notice how I focused on the lesser used colors in the paper pack to make it feel less like a patriotic product?  By adding just enough black and yellow, it changes the entire feel.  Try it with any paper pack!

I hope you enjoyed getting out of the box today!  I'd love to hear your comments, or even have you become a follower or email subscriber.  Now it's time to hop along to the Wizard's Hangout and see the fabulous project Vicki has for us this month.  Hope to see you back here soon!

Win a Black Cat Lynx!

I got an email today from SVG Cuts.  In addition to their regular free cut file (a cute Wonderland inspired group), there was a nice little surprise waiting for me.  It seems that the super nice folks at the Black Cat Company have donated a Lynx cutting machine to be given away! 


I have been coveting one of these babies for a while now, and any one of us could be lucky enough to win one.  It's super easy to enter, so just click here to see head over to SVG Cuts and enter!  Good luck to us all.

Time is Running Out

Today is the last day to take advantage of all of June's specials from Close To My Heart.

Don't forget to check out the versatile June Stamp of the Month, Jubilation, available at a discount or even free!
It's also your last chance to support those affected by recent severe weather in the US, by purchasing the You & Me kit for only $15.

Finally, take advantage of the Studio J Free-For-All to get your free digital JPG file just for trying out Studio J.  I like to call it digital scrapbooking for dummies, because even I can figure it out, and it's fun!

One last note: make sure to stop by tomorrow for our Stamp of the Month blog hop for July, and some tips for getting out of the box!

Saturday, June 25, 2011

Borders, Borders Everywhere

Let me preface by saying that it is HIGH time I get myself in a Copic class.  I had one heck of a time coloring the face on this today, but I have vowed to practice more with them in the hopes that I will eventually learn to love them!

I've had very little crafty time lately, so I decided to enter a couple of challenges today so I would at least get to play a little before I dig in & get back to the drudgery of housework!  I based my card on a sketch for Which One Wednesday at the TGF Farm Fresh Challenge Blog, and opted to go all-in with some border strips for the Beautiful Borders Challenge in the Moxie Fab World.   Go check them out and you can play along too!


I love how she just happens to fit in the circle design so perfectly; like she's lounging around there.

I used the following supplies to make my card:
  • Kraft card base
  • Springtime papers from Echo Park
  • Black and white cardstock
  • Cheeky Rockabilly stamp from The Greeting Farm
  • Copic markers
  • Ribbon from the Animal Crackers Jack collection by Making Memories
  • Border punches from (top to bottom) Martha Stewart Crafts, EK Success, Martha Stewart Crafts, & Stampin' Up!
  • ATG adhesive, Scor-tape (for the bottom 2 borders), and foam pop dots
Shameless plug: the Echo Park papers, The Greeting Farm stamp, Copic markers, and all adhesives are available over at Cutters Creek!

Thanks for stopping by; I always love to read your comments!  If you feel so inclined, I would also love for you to become a follower (I also have email and reader options).

    Friday, June 24, 2011

    Big News for Electronic Die-Cutters!

    If you own an electronic die-cutting machine, you are going to love this newly announced product!

    Creatively Simple...

    New Simple Shapes from Lettering Delights will make your creative life simple, regardless of your cutting machine. Introducing over 50 sets of new single-layer cuttable images offered in multiple cutting file formats. Whether your machine requires ai, eps, svg, svg without layers, dxf or pdf files, you simply can’t live without Lettering Delights’ new line of Cut Its.

    To accentuate this exciting news, you can get all 50 sets of Simple Shapes in one amazing bundle. The Cut Its Simple Shapes Super Bundle includes over 780 new single-layer images in a variety of topics and themes for only $49. That’s less than 6 cents per image!

    Whether you choose to purchase sets separately for just $4 each or grab the whole bundle for $49, you’ll find that these simple shapes offer so much more than just your basic silhouettes. They’re hip and fun with oodles of creative potential! To see what we mean, take a look at the sets and check out the five project ideas featured at Lettering Delights.

    Hurry! Though Cut Its in new file formats promise to stick around, the $49 pricing is available for the next two weeks only.

    Here are a few examples of the individual sets, just to entice you a little more!
    Quirky Art

    Simple Shapes Farm
    Simple Shapes Rockstar

    Game Spinner Cut Files

    Someone in one of my groups was looking for a game spinner.  I created a simple one pretty quickly, and thought I would share it here for others.  I haven't made anything with it yet, but it cuts just fine.  My only request if you want to share this with other is to point them here to get it rather than forwarding it along.  Feel free to use it for any purpose, including commercial.

    I have both the SVG and MTC files available on Google Docs.  You should NOT need to create an account in order to download them.  Please leave a comment if you download, and feel free to share a link to any projects you make with it in your comment.  I'd love it if you'd join my followers or subscribe via email or a reader.  Now, here are the links to the files:


    UPDATE: I can't get Google Docs to handle the SVG file properly, so if you want that version, please let me know and I can email it to you.

    Tuesday, June 21, 2011

    It's a House Party!

    No, no, not those horrible Kid & Play movies - oops, I think I am dating myself again!  Oh, well.  Anyway, this House Party is a website where you can sign up to host a variety of events (www.houseparty.com).  Past event have included things like a Singer sewing machine trial party, Bic razor sponsored scrapbook party, and the one I recently hosted a Sauza-rita party sponsored by Sauza Tequila.

    So, just a quick share, as I thought some of you might be interested in joining the website as well.  They are NOT, I repeat NOT sales parties.  You are generally sent free samples of things for you & your guests to try, in the hopes that you will both make future purchases and spread the word about the product(s) to your friends.  There are separate sections for the 18+ and 21+ parties, so if you aren't interested in that type of thing, they are completely separate.

    For my party, I received a free Sauza apron, pitcher, & margarita glasses.  I also received a set of fun "conversation starter" cards that made getting to know each other a little more a lot of fun!  One of the questions was "Who was the worst boss you've ever had?"  Lastly, since they can't send free liquor through the mail, I received two $5 off coupons for Sauza Tequila, and a stack of party planners with $3 off coupons to share with my guests.

    I think the margaritas made answering the questions even more fun, especially that one about your worst boss!  I'm sure a lot of my friends have heard me rant about this particular former boss on more than one occasion, but things get slightly more, shall we say colorful, when I've got a few margaritas in me!  And it's nice to know that I'm not the only one to have had a boss from "down below".

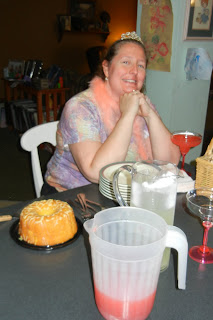
    Just for grins, here are a few pics of the fun.  If you want to find out more about becoming a House Party host, just visit their website.
    This is just the beginning...
    Why yes, lemon cake & lime pie are excellent with margaritas!
    Betsy came fully prepared with boas for all of us to wear!

    Monday, June 20, 2011

    Get Your Deal On - While Supplies Last!

    Everyone knows I love a good deal - after all, some of my favorite stores are Tuesday Morning, Big Lots, and thrift stores, lol.  So I'm always really excited when Close To My Heart marks down my favorite scrapbooking and card making supplies.  I cruised over this morning to check out the While Supplies Last section of the web store, where there are currently deals of up to 80% off!

    Since these are mostly retired products, everything is while supplies last only, and can change at any time.  Here are a few of my favorite things that are available right now:

    Creative Basics Emporium Collection

    For only $2, this comes with 16 sheets of double-sided paper (8 each of 2 patterns) plus 8 yards of ribbon.  I personally love to use the Creative Basics with the workshop patterns in the Wishes card making pattern book to make loads of cards quickly.


    Passages Bundle 2

    For just $7.50 (less than half-price!), this bundle comes with a paper packet of 12 patterned papers (2 each of 6 patterns) and ten coordinating cardstocks, plus a package of embellishments.  The vintage papers in this pack are great for masculine or heritage scrapbook pages, as well as some manly cards.


    Embellishments and More

    There are also lots of embellishment options, including ribbon collections for $4, an assortment of felt die-cuts for $1.50, and these gorgeous self-adhesive Cherry-O Pearl embellishments marked down to $3.25.

    So head on over and get yourself some deals, while they last!  I know what I'm going to go buy...

    Thursday, June 16, 2011

    Punny Father's Day Card

    As usual, I am working last-minute on things, and this is quick enough for you to copy like right now, lol.  My kids all learned to fish with my dad, so I made this 5x7 card for him for Father's Day.


    My "water" was made using white core cardstock in Lagoon from Close To My Heart.  I used coordinating ink on the edges and swiped across the CS.  Then I embossed it using the Retro Circles embossing folder from Sizzix/Tim Holtz, and sanded the raised areas to show the white core.  I love the effect this has!  I cut the fish from scraps using the Create A Critter cartridge for the Cricut, and adhered it to the front using an Action Wobble.  (I know, you can't see it, but it looks really cute in person.)

    I added a punny little sentiment on the inside:

    This sentiment could be altered for a cute birthday card as well, especially for those fun Summer birthday parties involving pools or water.  I wrote the sentiment with a free font called Angelina and my Make The Cut software, using a black marker and my *die cutting machine.  I love how I can tell MTC exactly where to place the sentiment and just stick my card blank to the cutting mat, no worries.

    Thanks for stopping by today!  I love my visitors and your comments; and you can always let me know if you need more info on a product or technique I used.

    *MTC is no longer able to be sold to work with a Cricut machine, but there are several other die cutting machines on the market that DO work with the software.  I suggest visiting the MTC forums if you want to find out more about these machines.

    Wednesday, June 15, 2011

    My Top 5 "Underrated" Products

    This month the Design Team over at Cutters Creek is sharing our favorite products, and I thought I would do things just a little differently.  So today I'm sharing with you 5 awesome products that don't usually get a lot of attention.  After all, how can the basics compare with all the shiny blingy goodness of things like Glimmer Mist and Stickles?  Well, let me show you!  Here are 5 products I could not craft without:

    And here's what makes them so special:

    Clear embossing ink & powder is an indispensible combo.  You can use them alone on colored cardstock for a great tone-on-tone effect.  Or, try this idea: stamp a background stamp with clear embossing ink on white (or light colored) cardstock and coat with clear embossing powder, then heat with a heat tool.  (By the way, that heat tool also comes in very handy when you need to dry things quickly - Glimmer Mist, even some kinds of Stickles.)

    Next, use your stamping ink to color the background.  You can use your choice of applicator tools, or even direct-to-paper.  I used a brayer on this piece; I also chose to use textured cardstock here for a fabric-like appearance.  Wipe off excess ink using a tissue, then trim the panel to your chosen size.


    That stamping ink comes in handy for all kinds of things, and many of them don't involve a stamp at all.  I used mine to color part of some Petaloo Color Me Crazy flowers, as well as edging a ribbon slide sentiment label for added definition.  Ink also adds some awesome dimension to your die cuts when you sponge all the edges with coordinating ink.


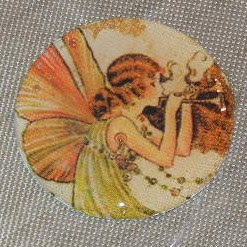
    Glossy Accents serves two functions on my craft table.  It makes an awesome adhesive when you're adhering something odd shaped, or with uneven texture, or something you need to be able to move around a little before it's permanent.  And the most fun use is to make your own epoxy stickers.  For this project, I fussy-punched a circle from some fairy paper, outlined it with Glossy Accents, then filled it in.  Any air bubbles can be popped with a pin before it dries, if you choose.  This technique does involve drying time (sorry, the heat tool won't work here), and the thicker the gloss the longer it will take to dry.


    The wet Glossy Accents will look milky.
    Dry Glossy Accents will be shiny and dimensional.


    Finally, the Pigma Micron pens are perfect for adding all kinds of details.  I love the set of three, since the different line widths can give a different feeling on your projects.  They dry quickly and won't smudge,  so I love to use them when I need to hand write all or part of my sentiment.  Another alternative is decorative pen work, such as doodling some flourishes.  Or, as I did, adding drawn stitching.  To make it more realistic looking I punched holes first, using a paper piercer and my Tim Holtz ruler.


    With these few basic supplies, you can create all kinds of different designs.  Simply change your stamps, paper color, and/or ink color for a completely different look in a short period of time!


    FYI, for those who are interested: the background stamp is from Cornish Heritage Farms and the sentiment stamp is from Close To My Heart.  The ribbon slide label was cut using Make The Cut software.C

    Saturday, June 11, 2011

    June News from Your Close To My Heart Independent Consultant

    My June newsletter went out today. Offerings for this month include a free Studio J digital file; a special to help the recent victims of flooding, tornadoes, and storms throughout our nation; our stamp of the month; and savings of up to 80% while supplies last.

    You can see the newsletter in it's entirety online here.  If you'd like to sign up to receive my newsletter monthly, there is a link right in the newsletter or in the left sidebar here on my blog.  Thanks for stopping by!

    Thursday, June 9, 2011

    Free-For-All in June

    Have you tried StudioJ online scrapbooking yet?  I equate it to "digital scrapping for dummies", lol, because I was actually able to figure it out pretty easily!  During June, everyone can try StudioJ and receive a JPEG file of their layout for free.  This digital version can be printed (if you don't order a print directly from StudioJ) or shared online or via email.

    Here's the free layout I created:

    Once you create your free layout and "purchase" it, you will receive an email with a link to download your file.  Then, if you're on FaceBook, you can head over to Close To My Heart on FB and enter their StudioJ Free-for-All contest.  Grand prize winner receives the following:
    • Credit for 10 two-page, custom-printed scrapbook layouts.
    • 10 Memory Protectors® to slip their layouts into.
    • Free shipping and handling, so their custom-designed layouts will come straight to their door, ready for their cherished album!
    I'd love to hear what you think of StudioJ - try it out and leave me a comment or send me an email and give me your opinion!  Please let me know when you contact me if you are a traditional scrapper, digital, or somewhere in between.  I'll be sure to pass on a list of opions, comments, and critiques, to the powers-that-be at CTMH.

    School Scrappin'

    Sometimes it can be hard to scrap pictures from school.  If you're lucky enough to have a school that even sends home an occasional picture, it is generally just one.  I personally don't generally do single photos or single page layouts, but sometimes school things have to be an exception for me.  Since those go in the kids' personal scrapbook, they cause me less trouble than in the family albums.

    Anyway, The Boy has been receiving speech therapy since he was 2 years old, and this April he was finally able to "graduate" out of services (he is 6).  The SLP at school is so sweet, she sent home a graduation photo and a diploma, so of course they are headed for his scrapbook.  It can be hard to include large items like a letter-size diploma on a traditional scrapbook layout, so I have a little tip.  I love to use sketches for my layouts, so for this one I opted to flip through a sketch book, looking for a specific type of pattern.  I looked for one with a single vertical photo on one page, and a grouping of photos close to a combined size of 8.5 x 11.

    I recently ordered volume 7 of Sketches for Scrapbooking from Scrapbook Generation Publishing, and that's where I found the perfect sketch!   Here's my layout:

    Obviously, I can't share the actual sketch here, but I do have a couple more tips about this.  First, the sketch called for a die-cut paper, so I just cut my own using Make The Cut software.  Also, the sketch showed a line of trees on the right page as embellishments.  I changed them to "award" rosettes and added ribbon tails to the largest one.  All of the rosettes are also cut from Make The Cut, using SVGs from the Accordion Fold Rosettes set from Lettering Delights.  Finally, all of my main pieces are sponged on the edges using coordinating stamping ink for added dimension - it just makes everything feel more "finished".

    If you like the style of this sketch, you can visit Sketch Support, where Allison (one of the SG designers) offers free sketches weekly for double-page, single-page, or cards, plus bonus sketches.  Be sure to let her know that I sent you!  You can also buy any of 7 volumes of sketches for scrapbooking, plus 2 volumes of sketches for cardmaking.

    Sorry, all of my pattern papers are from my stash (discontinued).  The title was cut using my Cricut and Plantin Schoolbook, welded on the Gypsy.

    Friday, June 3, 2011

    Last Day of School

    Yes, I know, 2 posts today -  unbelievable!

    Thanks to snow days, today is FINALLY the last day of school for my Kindergartener.  (The girls get to go back for a whole hour on Monday - crazy.)  Anyway, after a little trip to Panera this morning to enjoy our final sister-free morning, I whipped up a little card for The Boy's teacher.  (I know, nothing like waiting until the last minute.)  I have a feeling his teacher put up with quite a lot this year, lol, and not just from him!


    Once again, I actually exceeded my expectations for a card!  I just l-o-v-e how this turned out, especially considering I waited until the last minute.  These clear cards always look so great, I'm sure that's a lot of it.  OK, the clear card base is from Close To My Heart.  I cut the circles with my Cricut from Plantin Schoolbook at 3.75" and 4".  The white paper is stamped with the School Paper cling rubber stamp from River City Rubber Works using Sky ink from Close To My Heart.  The abc and 123 are from a discontinued stamp set in my stash.  The paper was then sponged with Topiary ink from CTMH.  The apple is from the My World Cricut cartridge.  I cut the layers from (top to bottom) Topiary, Cranberry, Holiday Red, and Black cardstock from CTMH.  I colored the stem with a Chocolate marker, and sponged the edges of the leaf with Topiary and the top layer of the apple with Cranberry inks from CTMH.  The white layer is adhered to the outside front of the card and the black is adhered to the inside front of the card, both using Scor-tape.  The apple is popped up using Pop Dots.


    The "Thanks" and "Teacher" stamps are from another discontinued set in my stash; I hand wrote "for being my".  I colored in the "Thanks" image with a Cranberry marker and sponged the outside of the white paper with Topiary ink from CTMH to match the front of the card.  I adhered the white paper to the inside back of the card and the black to the outside back, again using Scor-tape.  Not shown, I signed the card on the back with a Uniball Signo white pen.

    Party Time!


    Just a quick post today - I wanted to share my 10yo daughter's birthday invitations. She's just inviting a few friends, so we opted to make them. She wanted monkeys, and chose the Create-a-Critter version.  I set everything up in the Gypsy so that I could cut many of the pieces at once using  strips of cardstock.  I did the monkeys and vines on one mat, then the phrase and inside items on  the second.

    Simple this time (no inking - shock!) since Sarah did much of the assembly.


    The bananas inside were Sarah's idea.

    The inside of the  invites were stamped with Chocolate brown ink and the Party Pennants stamp set from Close To My Heart.  I'm really glad there were only a few of these to fill out - there was WAY too much writing!
    Related Posts Plugin for WordPress, Blogger...