Tuesday, September 30, 2014

There's No Place Like Home For the Holidays - Stamp of the Month Blog Hop

Hello and welcome to October's Stamp of the Month blog hop! This month we are featuring Home For the Holidays, a set of 7 stamps perfect for your Christmas projects. If you've arrived here from Sheila Bennett's blog, or if you are just starting out, you are in the right place. I have a complete list of hoppers right here in case you get lost along the way - you can open it in a new window now and continue the hop on this page.

You are in for a treat today with all of these great projects from everyone! I will freely admit that, with Halloween not even here, I was not really feeling it when it came time to work with this stamp set. But as soon as I started, the ideas just kept coming...


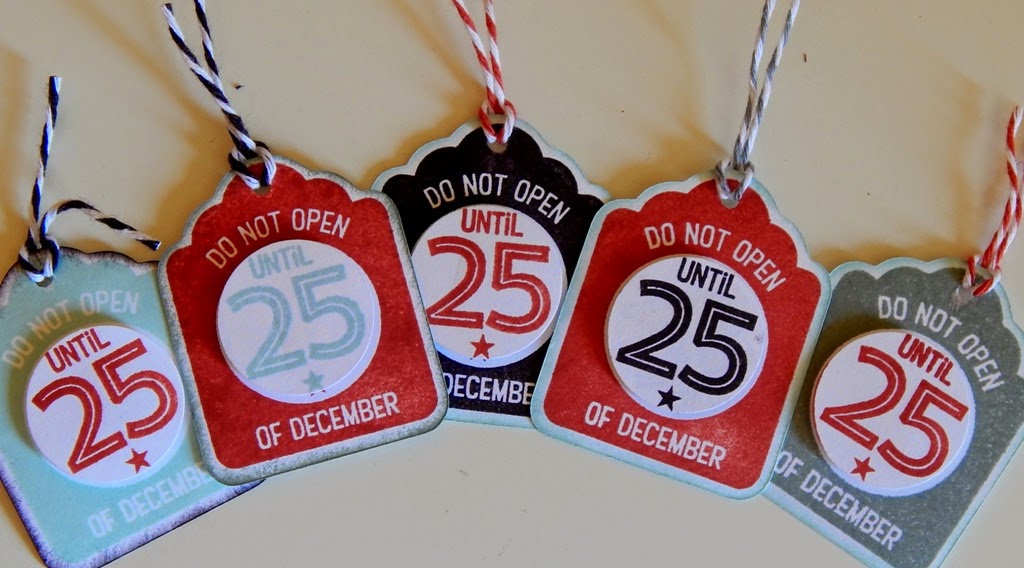
 I will start by letting you in on one of my favorite organizational and secret-keeping tips for Christmas. We have three Christmas celebrations, so I use one color scheme for gifts to go to my family and one color scheme to go to the hub's family.

 
For our own house, I get sneaky. I assign each kid a tag color and nobody knows whose is whose.  I can wrap and put gifts under the tree without waiting for Christmas Eve and there is very little chance of sneaky people figuring out what their gifts are.


I stamped tags in multiple colors and punched out the center circles of half of them. I then popped it up on foam tape over a contrasting color tag.


A little length of twine through the hole is a simple addition to these cute tags.


This other tag style in the stamp set is super cute on its own or as part of a card. I stamped the entire image in Cranberry on a tag, then in Slate on a scrap.  I cut out the house portion of the gray image, using an X-acto knife to cut the window, and adhered it over the Cranberry image on the tag. I colored in the wreath with an alcohol marker.


Finally, I made these two easy greeting cards. They took very little time, and I just love the way they turned out!


For this card, I cut the coordinating ornament shape once from White Daisy cardstock and twice from patterned paper from the Snowhaven paper pack. I stamped the ornament image in Cranberry on the white ornament, and in Glacier on a scrap.  I cut out the inner image and popped it up on foam tape. I sponged the ornament edges with Slate ink and adhered them to the card front over a piece of pattern paper and Silver Shimmer Trim.


This final card features that oh-so-cool polar bear stamp.  I cut the coordinating Cricut shape from White Daisy and stamped the image in Glacier ink. I then cut the frame from Cranberry cardstock using the Layer feature key on the Cricut cartridge. After sponging the frame edges with Cranberry ink, I adhered it over the stamped image.

Finally, I stamped the image again in Cranberry ink on a scrap of White Daisy and cut out the scarf portion. Again, I sponged the edges with Cranberry ink and adhered it over the complete image. I layered a pattern paper mat and a Cranberry mat on a white card base, then adhered the image, Silver Shimmer Trim, and some Red Enamel Hearts.

I hope my projects got your creative juices flowing today! When you're ready to hop along, we can head over to see what Dawn Ross has created this month. Or, if you'd like to shop first, I have a list of everything I used. The links open in a new window, so there's no fear of losing your place in the hop!

Snowhaven paper pack
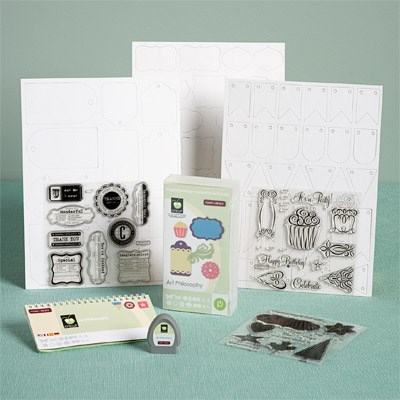
Art Philosophy Cricut collection
Silver Shimmer Trim
Red Enamel Hearts
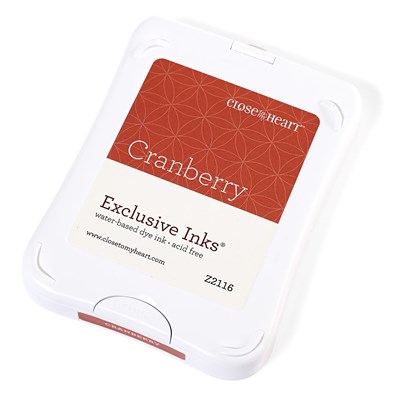
Stamp Pads in Cranberry, Glacier, Black, and Slate
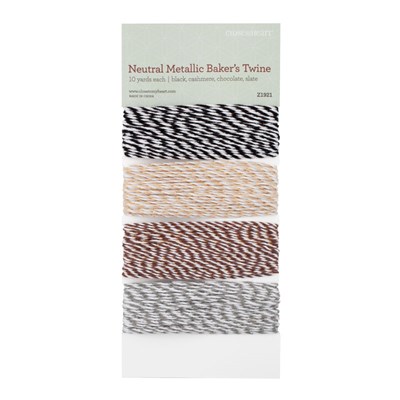
Baker's Twine
Sponge Daubers
3-D Foam Tape
Non-stick Micro-tip Scissors

Nothing Could Be Easier

I'm back today with a reminder that this is your last chance to get the September stamp of the month. I also have one of the easiest pretty cards ever for you to try.


This would make a great wedding or anniversary card, and is easy to make in whatever colors you wish. If you switch to all pastels it would make a great baby card as well. I used Glacier, Barn Red, and Kraft cardstock for a 5x7 card. Here's how easy it is:

  • Make a 5x7 card base with Kraft cardstock.
  • Cut a piece of Barn Red cardstock to 4.75" x 6.75" and sponge edges with Barn Red ink.
  • Cut a piece of Glacier cardstock to 4.25" x 6.25" and sponge edges with Glacier ink.
  • Stamp the tree with Cocoa ink on the Glacier panel.
  • Stamp the tree again in Barn Red on a scrap of Barn Red cardstock and cut out the two center hearts.
  • Stamp the word "LOVE" with Glacier ink on the Glacier panel above the tree.
  • Layer the two panels onto the front of the card with adhesive.
  • Adhere the smaller of the two Barn Red hearts directly to the Cocoa version, using a glue pen.
  • Adhere the larger heart using foam tape.
 I hope you enjoyed today's project! Here's what the entire stamp set looks like:


You can purchase the stamp set on my website outright for $17.95, or get it for just $5 with any $50 purchase. The option to purchase it at the reduced price automatically appears in your shopping cart once you have added $50 worth of merchandise. Remember, this stamp set is gone after today and a new one starts tomorrow!

Monday, September 29, 2014

Even More Happy!

We're nearly out of time for the #30yearsofhappy promotion from Close To My Heart. This neat stamp set is only available until the end of September, and with the purchase of $30 worth of current stamps you can get yours free (a $13.95 USD value).


Here's another sweet project I made using this stamp set:


I made a whole passel of these little favor bags for a recent Woman's Club meeting. Each one held a piece of candy from a terrific area candy shop.


This single stamp made a great flower center in a contrasting color.  I cut the two flower layers as well as the center using the Art Philosophy Cricut cartridge.


The mini bags are from Webster's Pages. I simply added a strip of Lagoon Hearts washi tape and the flower I made. After putting in the candy, I just folded the bag over and stapled it with the Mini Stapler.


There are lots of other great ideas out there using this stamp set, including petite little gift cards and plenty more.  You can check them out at any time by simply searching for the hashtag #30yearsofhappy on Pinterest, Twitter, Facebook, and more.  Be sure to get your stamp set before September ends! Head over to my website, and once you've added $30 worth of current stamps to your cart the option to add this stamp set free will appear at the bottom of your cart.

Friday, September 26, 2014

Halloween Banner Layout with Scaredy Cat

Who else still has Halloween pictures from years past in a box? Even if you're all caught up, you're going to want these great Scaredy Cat products for this year's projects.


Counting, sorting, and trading Halloween candy has become a tradition at our house, so of course it was something I wanted to document in photos. I used a sketch pattern from one of the how-to books from CTMH.


This awesome banner is so easy to make using the title stickers from the Scaredy Cat Complements pack and some Colonial White cardstock.  I just trimmed some rectangles into pennant shapes and punched holes with a mini hole punch. (I totally wanted to do this with the Art Philosophy Cricut cartridge, but the H x W ratio was a little off for my needs. It was still easy, just took a little longer.)  I strung them on twine and adhered them to the pages, using tape runner for the pennant shapes and a little Liquid Glass for the little bows at each end. Regular tape on the back of the plain end keeps that in place.


The Complements stickers also make it easy to add a little scene to the wide  open area on the layout. I added a few purple Glitter Gems and black Sparkles for accents and that's all there was to it.

Be sure to check out my Kit of the Month specials for September, including Scaredy Cat and coordinating products. There are also pictures of lots of great artwork from CTMH designers on my Kit of the Month page, so be sure to check those out too!

Wednesday, September 24, 2014

#30yearsofhappy

If you have not yet seen the National Stamping Month promotion from Close to My Heart, I've got some news for you.  When you spend $30 on any current retail-priced stamps during the month of September, you qualify to receive the exclusive C-sized stamp set #30yearsofhappy for FREE (a $13.95 USD value)!


Here's just one example of what you can do with these fun little stamps:

 
 These are some treat tubes I decorated - mine are for some scrapbookers coming to a day of classes, but of course you could put anything in yours.


I only used a small selection of the 30 stamps in this set for this project. You can see all kinds of other projects using the stamp set by searching for the hashtag #30yearsofhappy on Instagram, Pinterest, or Twitter.


Just a little tip: if you're gifting to other crafters, you can wrap a length of washi tape around the outside of a treat tube. It unwraps just as easily from here as it does from the roll.

See more details right here, then you can shop for whatever current stamps you like and the offer will pop up in your shopping cart when you're ready to checkout.

Friday, September 19, 2014

Trouble's Brewing - Scaredy Cat Kit of the Month Layout

In case you haven't checked out the Kit of the Month page yet this month, we're all about Scaredy Cat this month!  Get a jump start on this year's Halloween projects, or (like me) catch up on scrapping some pictures from previous years.


One of our neighbors has a birthday near Halloween, so she has a costume party every year. This was a 70's theme to celebrate her 40th.

I used a sketch from Scrapbook Generation, but changed these up some based on the papers I had and what I wanted to focus on.  I had only small pieces of the large pattern left, so I used that for the end strips, and the smaller pattern for the large section even though the sketch called or them the other way around.  I also used Thistle cardstock for the remaining panel, rather than another pattern, because there is so much going on in the photos. Finally, I substituted Pear cardstock strips where the sketch called for a striped pattern, so I could pull in the green. (I wanted to focus on the picture of me and my hippie friend, lol.)


For my title, I used "Groovy" from the Groovy Times Cricut cartridge and the curlicue font from the new Artfully Sent Cricut collection. And of course, I inked the edges of everything.


I simply used cardstock stickers from the Scaredy Cat Complements to embellish the layout, and added strip journaling as suggested by the sketch.

To see all of the available items for this month's special offers, be sure to visit my Kit of the Month page. All of the links to go shopping are right there to make it easy for you. There are also plenty of pictures of artwork created by the awesome designers at CTMH to help inspire you.

Tuesday, September 9, 2014

Christmas in September - Creations by AR Blog Hop

Yes, it's only September. Yes, we just got our kids sent back to school (hooray!). And I think now is a great time to look ahead and start planning for Christmas!

A quick peek at all three new files. Read on for details on each!

Adela is back with three fabulous cutting files for Christmas and Winter, and as usual, you could win the file of your choice just by hopping along with us.  Three random commenters will be chosen from the designers' blogs and the AR Facebook Page to win one of the three new files. Be sure to leave a comment on all of the blogs (listed at the bottom of this post) and the Facebook page for your best chance to win!  Comments will be accepted until Friday, Sept 12, 12:00 noon Eastern. Winners will be announced September 13 on the AR Facebook page and the AR website.

Now, who's ready to check out the new designs? I should mention that these are each for sale individually, as well as a money-saving Winter Bundle.  Let's start with the super cute Gingerbread Gift Bag:


This sweet gift bag is super easy to put together. You'll need two sheets of cardstock for the bag base, and mostly scraps for everything else.  For my bag, I used the heart design cardstock from CTMH's Paper Fundamentals Basic Assortment. I used the side with the ink resist pattern as my outside, and sponged it with darker ink to play up the pattern more. (You can see in the photo, the other side has the same design in white.)  I used white glitter cardstock from American Crafts for my snowy accents, a scrap of Graphic 45 for the wreath, and plain cardstock for everything else.  I glazed the round part of all of my lollipops with Liquid Glass to make them nice and shiny like the real thing. I added details on my "people" with a Uniball Signo white gel pen.

Now let's check out the super sweet set of Starry Trees:


These are even easier to put together than the gift bag! And you have two options: a plain design that looks great with busier patterned paper, and a cutout design that is perfect for cardstock or a simple pattern.  You'll need a piece of cardstock for each inner base (I used brown for my plain trees, and yellow for the cutout one), but you can get two of the covers on one sheet. I used Graphic 45 papers for my trees, so I didn't even bother with embellishments other than the banners that come in the file.

I think these would make great place favors for a dinner or party, and you could write each person's name on the banners. Or, if you have a more informal buffet-type gathering like my family, just use the included words or stamp them all with "Merry Christmas"!

Finally, let's take a closer look at this fun Stack a Snowman:


This fun little guy takes a little more effort, but still easy enough to whip up quickly.  I used textured cardstock for his body and patterned papers from CTMH's Snowhaven paper pack for his other parts.  I wanted to used a light blue patterned piece for the center box, but I only have the consultant sampler on hand which wasn't large enough so I let him white. (Guess what's going on my next order?!)

He's easy to embellish with a little ribbon and some adhesive gems and a pearl. I used brads for his coal buttons and mini brads for him eyes and mouth. I drew on his carrot nose with a Copic marker.

As a reminder, all of Adela's files come with a PDF version as well, for those of you cutting by hand. All three of these should cut by hand easily.

Now, don't forget to visit all the participating blogs and leave a comment for your chance to win:

Lori (YOU ARE HERE)

Monday, September 1, 2014

Eek! - It's Another Scrapbook Generation Blog Hop

Welcome to the Scrapbook Generation Blog Hop for September. If this is your first stop, be sure to visit ALL of the blogs and leave comments for your chance to win.


 I used a 7 photo sketch from one of the books, altering it only slightly to best work with my photos. I kept this layout super simple, putting the focus squarely on my photos. I used only stickers, to keep things fast, and a couple of cute White Enamel Stars to anchor the ends of my striped strips of paper. The paper and stickers are from the Scaredy Cat line from Close To My Heart. (This is also my featured Kit of the Month for September, so be sure to check out the Kit of the Month page AND be sure to come back and see me again this month for more ideas with this line.)

You can find the SG sketches in their books and as downloads in the SG store, and there is a free one every month in case you wanted to try it out. Next on the hop is another Lori! Leave a comment on each blog and one lucky commenter will receive a free sketch bundle of their choice from the store.

The winner will be drawn on Monday, September 8th which leaves you one week to leave a comment.

In case you get lost at any point, here is the list all the blogs
Scrapbook Generation blog - http://scrapbookgeneration.blogspot.com/
Steffanie - http://steffanies.blogspot.com/
Ruth - http://scrapmachine.com/
Cassie - http://allsmilesandsunshine.blogspot.com/
Devra -  http://mycreativeview.blogspot.com/
TinaGale - http://tiggersscrapplace.blogspot.com
Lori - http://savingmine.blogspot.com
Lori S - http://loriannie670.blogspot.com
Katy Taylor - http://www.scrappinkaty.blogspot.com/
Cicily - http://www.pinkdalmatianscrapper.com
Corrina - http://anotherthingoffthelist.blogspot.ca/
Related Posts Plugin for WordPress, Blogger...