Thursday, December 31, 2009

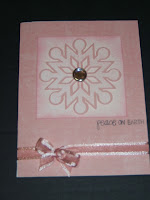
January SOTM Blog Hop

Happy New Year everyone! A new year means a new month, and that means it's time for another Close To My Heart blog hop! If you've come here from Barbra Otten's blog, you're on the right track. (And I hope my post measures up to her always spectacular work!) When you're ready to move on, the next stop is Brae Montgomery's blog.

I L-O-V-E this month's stamp set, as yet again we have a pretty versatile design. Yes, I know the sentiments are all "friendly", but these frames & such have a wide range of uses. You can see all 11 stamps up close by clicking here beginning January 1st!

I've chosen to show off this stamp set by combining it with the beautiful papers and stamps in Felicity, our special promotion for National Papercrafting Month. (Read on to the end of the post to find out more details on Felicity.)


First, I covered the front of my 4.25" x 5.5" card base with Barn Red textured CS and sponged the edges with Barn Red ink. Following sketch SC261 from Splitcoast Stampers, I designed my card front. I used the two Felicity papers that use the colors Sorbet, Barn Red, Desert Sand, and Chocolate for the two sections of the background in the sketch.

I stamped my chosen frame and sentiment in Barn Red on Sorbet CS, and distressed it using the black stubble texture tool with Desert Sand and Sorbet ink. I cut it out leaving a small border, and adhered it to the center of the card. Next, I stamped both sizes of flowers from the Felicity stamp set on Colonial White CS in Barn Red and Sorbet and distressed them. I cut them out, leaving a thin border on the large flower only. I adhered the flowers to the card front, popping up the center of the large flower and the Barn Red small flower with foam adhesive tape. I added (new!) Bitty Sparkles to the flower centers and the two frame corners (following the pattern from the stamp) to tie it all together.

Now you can either read on about Felicity, or hop along to Brae's Blog.

In celebration of National Papercrafting Month in January, we've created this versatile 12" x 12" Felicity Collection which includes 12 B&T Duos®, 6 new B&T die-cut papers, an exclusive D-size stamp set, and an artwork brochure filled with ideas to rev your creative engines! Featured colors include Autumn Terracotta, Sorbet, and Twilight.

There are 3 ways to get the exclusive Felicity Collection:
1. Add the Felicity Collection to your cart at the full retail price of $34.95
2. Place an order of $60 US / $70 CAN or more in stamp sets (A, B, C, D, and/or E-size) and get the Felicity Collection FREE! (Qualifying stamp purchases do not include Stamp of the Month, Art & Soul®, Workshops on the Go™, and customizable (K) stamp sets.) You'll be prompted to add your collection at checkout.
3. Place an order of $125 US / $145 CAN or more in Close To My Heart products and get the Felicity Collection FREE! You'll be prompted to add your collection at checkout.

This offer is available through January 31, 2010 or while supplies last.

Wednesday, December 2, 2009

December Christmas Card Challenge

I'm so excited! One of my favorite card challenge blogs is Christmas Cards All Year 'Round, and this month I am a guest Design Team member. This is my first time being on Deanna's DT, and I had a lot of fun playing for this challenge. Go check it out and play along!

The rules for this month are to create a card with the following:
~1 word sentiment
~2 different embellishments
~3 layers of paper

Here's the card you'll see on the CCAYR blog:
I'm going to include a closeup of the snowflake, because it has a little something extra that's difficult to see...

It may still be hard to see here, but it's a great effect in person. I cut the snowflake using the When It's Cold Outside mini cartridge for the Cricut. I used textured CS, then used the black distressing tool with Twilight ink to add a little color. Now, the fun part. I used some plastic packaging (like the cartridges come in) and cut the blackout image of the same snowflake. I attached the layers together using some eyelets, and added some Icicle Stickles on top.

Other supplies used are as follows: CS in Outdoor Denim and Twilight (CTMH), Aspen pattern paper (CTMH), sentiment stamp (retired CTMH), ribbon from my stash, and a ribbon slide (CTMH).

I also completed two other cards. The challenge is for 5 cards, but I haven't had time to complete those yet; I'll post again when those are done!

Here's another use of the When It's Cold Outside cartridge for the Cricut. This Nativity "snowflake" is just beautiful. I opted to use the Outdoor Denim CS again, and cut the blackout in Buttercup yellow. I thought this image had a great shadow or silhouette feel to it and these colors enhanced that. The other CS is Indian Corn Blue. (All CS from CTMH) Other supplies used include ribbon from my stash, a border stamp from CTMH to stamp the ribbon, sentiment stamp from CTMH, and some gorgeous brads from 7gypsies.

Here's another card using the recycled plastic packaging. I simply cut a piece the same size as my CS layer and embossed it with a Cuttlebug Folder. I attached it with a couple of glue dots where they would be covered by the star.

Supplies used are as follows:
Hobby Lobby - green card base from Christmas pack
Close To My Heart - Tulip CS, White Daisy textured CS, Ponderosa Pine stamp pad, Cranberry brads, chipboard element, white grosgrain ribbon, Jingle Borders stamp set ("merry christmas" from the sentiment border), and Shining Star stamp set.
Provo Craft - Cuttlebug Embossing Folder in Textile Texture


NOTE: I do receive compensation from Close To My Heart for products sold. I do not receive any additional complensation for using, reviewing, or recommending any of the products/stores seen here.

Tuesday, December 1, 2009

Have a Holiday Heyday and save 50-80%!

SIT BACK AND RELAX. IT’S OK TO START YOUR HOLIDAY shopping a little late this year, because the best deals start in December! You can buy everyone on your list a gift and stock up on much-needed supplies, leaving you time to enjoy the festivities! Beginning December 2*, you’ll want to get in on the amazing deals like My Acrylix® stamp sets from $2 and My Reflections® paper packets from $5. But that’s not all—we have “grab bags” for $30, each filled with over $100 in retail products! Plus, great shipping deals on orders over $100. These products are only available while supplies last, so mark your calendar and be the first to fill your shopping cart!

Start shopping HERE.

*Sale continues through December 17 or while supplies last. Shipping/handling: US orders of $100+ have a flat rate shipping of $5 US. Canada and non-continental US orders of $150+ have a flat rate shipping of $10 US/12.50 CAN. Tax is charged based on discounted amount.

Monday, November 30, 2009

December Stamp of the MonthBlog Hop

It's time again for another SOTM blog hop! We once again have 60+ consultants participating, so I know there will be tons of great ideas shared. If you've come from Caren's blog, you're on the right track! When you're done here, you'll want to head over to Lori Miller's blog and check out her great dry erase board this month.

This month's stamp set is Notice the Details, a versatile set of 41 stamps with an "office-y" feel. I say versatile, because this great stamp set can work with ANY paper! You'll see what I mean below...

I opted to create a 2-page layout for my main item this month. Thanks to my son's preschool, I have some great pictures from when the fire department visited them at school:
These stamps added a great touch to the pages. I even used the torn spiral edge stamp to make it look like the two smaller photo mats were torn from a notebook. I thought it worked well for the "school" theme.

Tips & Techniques:
I didn't have the exact colors I wanted in my papers, so I modified what I had some, plus I used patterned paper & My Stickease letter stickers from 3 different kits! The key to combining papers (whether from our kits, adding different brands, or whatever) is to use common color elements. The letter stickers I used are from Free Spirit, which just retired (& has already sold out!), in Colonial White. The star paper is from Game On, and the main colors on this paper are Black and Bamboo (with a bit of Grey Wool).

The striped paper is where the technique part comes in. The original pattern is from Silhouette, and contains the colors Black, Bamboo, and Colonial White. I needed to add in some Cranberry for a shot of color, and the stripes are the quickest & easiest to modify. So here's what I did: I measured the width of the stripe I wanted to make cranberry and cut strips of paper that width. I ran my paper strips through my Xyron for speed, but it would work just as well to use your Tombow or Bonding Memories Glue. Then I simply stuck them over the area I wanted to cover on my paper.
Now you just use your modified paper as you would any pattern paper:

Additional stamps used on this layout are from Headline Alphabet.

Now, if you want to see what this stamp set looks like with a much more feminine paper pack, check out this previous post. (It opens in a new tab/window, so just close that to come back here & move on.)

Now, don't forget to hop on over to Lori Miller's blog next!

Wednesday, November 18, 2009

Sneak Peek of December Stamp of the Month

Once again, a sketch challenge to make me really use my noggin! Rubber Stamp Chat has a monthly sketch challenge sponsored by one of their vendors. This month's sketch is from Beeswax, and since I don't own any of their stamps I thought I would try to find some of my stamps I haven't used much yet.

I wound up pulling out Close To My Heart's stamp set for December, Notice the Details. As my title says, this is a sneak peek; it's not actually available until December 1st. I also added one of the cute silhouette stamps from Childhood Portrait, and used the Grace papers, some twill, and a Barn Red Edge Anchor.


My "binder clip" is actually a stamp from the set. I stamped the clip part directly on the other images, then stamped it again on a scrap. I cut out just the top, "clampy" part (I have no idea what it's called!), put a thin strip of dimensional adhesive along the top edge, and pressed it down so it lays at an angle like a real binder clip. I used Staz-On Timber Brown to stamp the word "Happy" on the edge anchor. It doesn't look really crisp like the other stamping, due to the smoothness of the painted metal, but it still works with the distressed look of everything.

To see more artwork with this versatile stamp set, stop back here beginning December 1st for our Stamp of the Month blog hop. Last month, we had over 60 consultants participating, and boy were there some great ideas!

Note: I do receive compensation from CTMH for sales of product. I do not receive any other form of compensation for using/posting/promoting their products.

Tuesday, November 17, 2009

November Christmas Card Challenge Entries

It's been a while since I've posted; this has been a very busy month! But, I have finally finished my entries for this month's challenge at Christmas Cards All Year 'Round. It was a definite challenge for me this month, as the rules were to only use one layer. I'm a very "layered look" kind of girl, so this took some thought (which is probably why it took me so long to finish these!). I used a couple of tried & true as well as some new (to me) techniques, and here's what I came up with (click on the photos to see them larger).

Individual cards, and details, follow.

First up, I created a faux layered card on glossy CS. I cut an oval from scrap using my Cricut & George cartridge. I used the oval first, to mask my image area in the center of the card. Next, I used the emboss resist technique with a snowflake stamp, sponging on Moonstruck ink (CTMH) for my background.

I then removed the positive image, and put down the negative "frame", so I could stamp my trees in the oval, using New England Ivy (CTMH). I colored in details using a Cranberry marker and stamped the sentiment with Cranberry (CTMH). I added gold & silver brads to my treetops, and was done! Stamps are Holiday Trinkets from Close To My Heart.

My second card uses teh same stamp set, plus an old evergreen stamp from Club Scrap. I used the good old Post-it masking technique, as I couldn't find my Masking Magic, and stamped three ornament bases and decorated them. Colors used are Tulip, Hollyhock, Honey, and New England Ivy (CTMH), as well as silver metallic, which I embossed.

I really liked how this card turned out, & may even use it for our bulk cards this year! Nice & simple, and quick - even the hubby can help me with this one!


I think this was my favorite card, but a little time consuming for bulk production! It looks much nicer in person, since the details were a little hard to pick up with the light today.

I first created a "window" with my Cricut Design Studio and George cartridge. After cutting, I used this as a mask to stamp my tree, sponge my interior, and sponge my base. I also used it with a Bamboo marker (CTMH) to outline for more definition. My only embellishment was a little Fun Flock in the left/bottom of the window panes for a frosty snow look.

Stamps are Holiday Joy from Close To My Heart. I used stamp pads in New England Ivy and Cranberry for stamping, as well as Honey and Vanilla Cream for sponging. I used markers in Cranberry and Goldrush for ornaments. (all CTMH) Fun Flock was plain old White.

Here's a fun technique I hadn't used before, and one I'd like to do again! Of course, I think I'll need a LOT more practice with this one, or need to switch from markers to pens.

I used a Cuttlebug Floral Fantasy embossing folder on my card base, but I used it backwards so my image was debossed rather than embossed. I then used Topiary and Tulip markers (CTMH) to color in selected debossed areas in the design. Here is where I think some ultra fine tips are called for, as the coloring doesn't look very neat, IMO.

Using my stamp block as a template, I cut out a portion of the card front then stamped the sentiment on the inside of the card. (Sentiment is from Holiday Trinkets set.) To add a little "something", I used a few adhesive rhinestones and pearls to the centers of a few flowers.

For my final card, I used the old standby gold embossing. My "frame" stamp had journaling lines, so I masked those off using a Post-it while I inked up the stamp. I then added my sentiment to the center. A few adhesive pearls finished it off.

Frame stamp is a retired CTMH set, Key To My Heart. Sentiment is from the Peace on Earth sentiment set. I used an Archival Brilliance ink pad in Galaxy Gold, and CTMH gold embossing powder.


Notes: I am compensated for sales of CTMH products. I do not receive any other form of compensation for mentioning any of these products.

Sunday, November 1, 2009

Shopping Extravaganza next week!

Join me at the Manhattan PTO Shopping Expo!
If you're looking for Christmas gifts, teacher gifts, something for the office, gifts for the bus driver, your holiday hostess or even a gift for yourself, this is the place to be!
Get a head start on your Christmas shopping at the PTO's Annual Home Shopping Expo! This event will be held at Wilson Creek Elementary, on Monday, November 9th, from 3 p.m. - 8 p.m. There will be great raffles from all vendors!
Vendors include the following:
Avon, Celebrating Home, Chic Boutique, Close To My Heart, Cookie Lee, Creative Memories, Curves, Double Take Photography, Dress A Neck, Gold Canyon Candles, Gram of Gold, Great Products 2go, Hand Stamped Creations by Lisa, Juice Plus, Lia Sophia, Mary Kay, Miche Bags, Moms Helping Moms, Pampered Chef, Party Lite, Reel Art Productions, Silpada, Southern Living At Home, Stampin' Up!, Sunsilks, Tastefully Simple, The Angel Company, Thirty-One Gifts, Tupperware, Uppercase Living, Votre Vu, and What A Charming Idea.

Please note that one of our vendors is a gold buyer, and YES she will be buying gold during this event.
If you want more information about any of the vendors listed above, you can contact Lori Brown at (815)478-5119 or email thebrowns@earthlink.net to be put in touch with the vendor.

The Manhattan PTO thanks you for your support!

November Stamp of the Month Blog Hop

Welcome to the monthly Close To My Heart blog hop! As always, we're featuring the stamp of the month set, and the set for November is Around the Block (D1377). I love all of the different things you can do with this set, since all of the parts are separate stamps!

If you're on the hop, and you've come here from Terrie's blog, you're on the right track! This month, we have 64 bloggers participating, and you're sure to find a wealth of ideas for using this great set of stamps.

This month, I chose to do a scrapbook layout. We moved into our then-new house over 5 years ago, and I had never scrapbooked the first time we all came to see our new home. This stamp set was just the perfect touch I needed, and here's how it turned out:


And, the close-ups of each page (click to see them larger):

With the number of elements used to "build" my houses, I opted not to use embellishments, and used only a single silver Bitty Brad for the door knob. I used the Sweet Home paper pack, along with some Heavenly Blue cardstock, to complete my layout. Stamp pad colors coordinate with the kit: Buttercup, Heavenly Blue, Indian Corn Blue, and Garnet. Layout design is from our Cherish book.

To make even more projects with the beautiful papers used here, you can check out our Workshop on the Go kit for Sweet Home. Follow the included step-by-step instructions to create the two workshop projects featured in the workshop guide: a two-page layout and six cards (2 each of 3 designs). Layout and card patterns are Jeanette Lynton originals created exclusively for this workshop.

If you're ready to move on with the hop, head on over to Cibele's blog to see what she has created this month!

For an even more exciting November, CTMH has made this month STAMPAGANZA!! Whether you're a long time fan of stamps or are just venturing into this fun hobby, now is the perfect time to grab some My Acrylix® decorative stamp sets! From November 3–30, 2009, when you purchase any two stamp sets (sizes A,B, C, D, and/or E only) at full retail price you will receive a third stamp set of your choice FREE (of equal or lesser value)— a savings of up to $22.95! Choose from any stamp set offered in any 2009 Idea Book or the current Product Review. Take advantage of this month’s great offer to add to your
assortment of these innovative stamps.

Remember to stop by my website beginning November 3rd to choose from all the great stamp choices available.
Shipping/handling apply. Stamp sets available for FREE include: A, B, C, and D-size sets only. E-size, customizable (K), Stamp of the Month, and Art & Soul® sets are not available as the free set. Stamp sets that count toward the qualifying purchase include full-priced A, B, C, D, and E-size sets only. Stamps that do not qualify toward a qualifying purchase include Stamp of the Month, Art & Soul, Workshops on the Go™, and customized (K) stamps.

Thursday, October 29, 2009

Thinking of You card - sketch challenge entry

I recently found out that an older friend is having some health problems and I want to send her a card to let her know I'm thinking of her daily. I knew the exact images I wanted to use, and remembered a great sketch I saw over at Rubber Stamp Chat for the monthly contest. This is what I came up with, and I thought it turned out beautifully.


Patterned papers are from the Basic Grey Lilykate collection. Glossy white CS is from Stampin' Up! Textured CS, Edge Anchor, dimensional adhesive, and all stamps are from Close To My Heart. Circle and scalloped circle were cut with the Cricut using the Plantin Schoolbook and Celebrations cartridges. I used the brayering technique on the glossy CS with a Kaleidacolor Baby Powder stamp pad, and embossed the butterflies with black embossing powder. I bent up the wings on both butterflies, and popped the right one up on dimensional adhesive.

Friday, October 23, 2009

October Christmas Card Challenge

I absolutely love the Christmas card challenges on the Christmas Cards All Year 'Round blog! This month's challenge is to use ribbon and pink papers, in honor of Breast Cancer Awareness Month. This was a true challenge for me, as I'm pretty sure I've NEVER made a pink Christmas card before! Here are my entries - individual cards w/ supplies used follow the main picture.

Please note: I have included links for my product sources where possible. I endorse and receive compensation for the Close To My Heart products. I do not endorse a particular website or receive compensation for any other products featured here.

My first card was made with my Cricut. In Design Studio, I used an image from Calligraphy Collection, rotated it, and stretched it until it looked more like a Christmas Tree. I cut the image from Sticky Pages and adhered it to my card. After peeling the top sheet off, I covered it with white microbeads. I used an adhesive rhinestone flower on top and circles for ornaments. I added my ribbon and a buckle along the bottom, accented with another rhinestone circle. Size is 5 x 6.5.

Sources: Provocraft - Calligraphy Collection cartridge; Stampin' Up! - Sticky Pages; K & Company - circle rhinestones; 7gypsies - ribbon buckle (I believe my color is Island);
Close To My Heart - Cardstock in Baby Pink and Bubblegum, Rhinestone Flower (no longer available); Other producuts: Organdy ribbon, white microbeads.

This standard size card was also made using my Cricut, and is a very simple design. My sentiment was stamped using the marker coloring technique to stamp a single phrase from a border stamp.

Sources: Provocraft - snowflake & shadow from Accent Essential cartridge; Recollections (by Michael's) - pink rhinestone brad; Close To My Heart - textured cardstock in Baby Pink from Spring Harmony and Blush from Winter Cozy, Exclusive Inks stamp pad in Blush and Grey Wool, black distressing tool, Jingle Borders stamp set; other - satin trimmed organdy ribbon.

The third card was so much fun to make! I stamped, colored & cut out my image on white CS and layered it on a second stamped image on my Baby Pink CS and added some fun Stickles for sparkle. Standard size card.

Sources: Ranger Ink - Icicle Stickles; Stampin' Up! - Watercolor Crayons in Bold Brights and Neutrals; Close To My Heart - Cardstock in Hollyhock & textured Baby Pink, B&T (pattern) paper from the Jingle paper pack (back side), Exclusive Inks stamp pad in Grey Wool and Hollyhock, Pretty Pins, and Designer Ribbon Rounds in Hollyhock.

For my fourth card, I really wanted to try the cute stamp of the month set for November (from CTMH). This one took a little longer to design as I wasn't sure ho to get the house and sentiment on the card together without covering anything up! I finally decided on a 6x6 card, with no matting of the image, and I think it turned out rather well. There are two features that are hard to see in the photo, but if you click on the photo you can see them better!

First, I colored in some of the white stripes using a ruler and my Ponderosa Pine marker. This helped the paper match the colors I wanted to use on the house better. Secondly, I used some loopy fibers (braided 3 strands together) to create a wreath for the door and added some red stickles to it.

Sources: Ranger Ink - Stickles in Frosted Lace and Christmas Red; Close To My Heart - Around the Block stamp set (NOVEMBER stamp of the month), Festive Thoughts stamp set (no longer available), Cardstock in Tulip and textured Baby Pink, Exclusive Inks stamp pads in Grey Wool, Tulip, and Ponderosa Pine, waterbrush, Designer Ribbon Round in Cranberry, and 3-D Foam Tape; other - pink velvet ricrac, loopy green fibers.

My final card is a 3x3 gift enclosure and is super simple to make. I used ribbon with a stitched center, so I could pull the stiches to scrunch the ribbon. Add a few buttons, a star brad, and a stamped sentiment and you're done!

Sources: Making Memories - star brad, Close To My Heart - Cardstock in Hollyhock and textured Baby Pink, Festive Thoughts stamp set (no longer available), Exclusive Inks stamp pad in Hollyhock; Other - off-white flat buttons, glue dots.

If you have any questions about how I did something, just leave a comment & I'll get back to you! I hope you enjoyed my cards, and that you go check out the fun CCAYR blog!

Thursday, October 8, 2009

A Friendly Reminder

Don't forget, today is the last day to enter the huge Scrap-box giveaway! See my original post here for the details.

Thursday, October 1, 2009

My First Blog Hop!

With the kids all in school, I finally have time to be able to commit to a regular blog hop! Since I love my Close To My Heart stamps, I've joined the CTMH Stamp of the Month blog hop. This month is a great Christmas set, with a really playful feel. It reminds me a little of Dr. Seuss, like the Who's tree in The Grinch Who Stole Christmas! So, without further ado, here's my entry into the world of blog hops:

Welcome to our Stamp of the Month Blog Hop! This is simple to do - just click on the link at the end of the post on each blog to move to the next one! Here we go!

I based my card on the Midpoint pattern in our new Wishes book. The only stamp set used is Holiday Warmth, the October Stamp of the Month. Other supplies used are as follows:
I popped my matted image up on 3-D foam tape for extra dimension, and I added Prisma Glitter with a glue pen for extra sparkle.
I repeated the sparkly glitter on the inside of the card. (A visual repeat of the sentiment!) Don't forget to "sign" your cards on the back! There's a great star stamp in this set that's a perfect place to scribble your initials.

Now "Hop" on over to Debra's Blog to see her work!

If you get lost on the hop or find links that aren't working, click {here} for a complete list of participating blogs. There are actually three groups for this month's hop, so if you want to see TONS of great ideas, go to the previous link to hop through all three groups!

Wednesday, September 30, 2009

ScrapBox - HUGE WorkBox Giveaway!

Are you dying for some organization in your life? Need to get your scrapping supplies off of the dining room table? If you're looking for some great Scrapbook storage, there's nothing sweeter than the Workbox from the Original ScrapBox!


How would you like to win this sweet setup? Take a visit over to the Midnight Madness blog, and get hooked up! Make sure you tell them I sent you.

Here are the other blogs where you can win:
Make It and Love It
Vanilla Joy
Auntie Thesis
The Mommy Files
My Organized Chaos
Life As Lou
Cricut Christmas
Capadia Designs
Rachelle’s Writing Spot

While you're waiting to find out if you're a winner, cruise on over to The Original ScrapBox and check out my favorite product, the super sweet MiniBox. There's room for this in any home, and they have enough colors/styles to choose from to match any decorating style! It only 37" wide, but stores a boat-load of crafting goodness - here's a photo:

And now, a great discount too! Enter this code when you place your order to get $100 off your shipping: 100Writes

Tuesday, September 29, 2009

Even More Disney with the Cricut

I'm pretty obsessed about completely scrapping this Disney trip before I get back to "normal" layouts. So, here's yet another series of shots from Epcot. My husband's favorite Disney movie is Aladdin, and he drives me crazy imitating the Genie a lot. So we HAD to find the Genie and get his picture and autograph. Here are the results:

Supplies used on this layout include the following:

Cricut - Dreams Come True cartridge, Opposites Attract cartridge
Close To My Heart - Stardust level 2 paper pack and MyStickease; Honey and Dutch Blue CS; Stardust Flexi Labels; White Daisy My Accents (discontinued); Fresh Shapes chipboard Dimensional Elements; Dimensional Foam Adhesive squares; Stamp Pads in Honey, Dutch Blue, and Moonstruck; layout page pattern from Jeanette Lynton

Stop by on October 1st for my first Blog Hop entry. Lots of stamping with a great Christmas set from CTMH. I'm sure there will be a TON of great ideas for Christmas cards!

Friday, September 25, 2009

Disney with the Cricut

I'm finally getting around to posting some more Disney layouts. I completed these a couple of weeks ago during a crop. This Snow White LO was based on a pattern from one of Jeanette Lynton's pattern books.


I cut the gorgeous title and the apples from the Happily Ever After Cricut cartridge. I just LOVED the font they used for "Snow White", but I had to make a few manual cuts to use it this way as it was part of a larger design.


Supplies used for this LO are as follows:

MME - all papers except white, flower die cuts
Creative Cafe - puffy felt flowers
Clear Scraps - clear flower shapes
American Crafts - pearl center brads
Close To My Heart - white flower rub-on used on clear flower shape, dimensional foam adhesive

Silhouette Card

I love the look of silhouettes, but I find I don't make them often because I don't seem to have the right stamp images. Thanks to the new Childhood Portrait stamps from Close To My Heart, I've got images I want to use for this technique over and over! Here's what I made first:

I used my Kaleidacolor ink pad in Cappuccino Delight for the background. Using glossy paper and a rubber brayer, just roll the ink on. Don't have a Kaleidacolor pad? Just layer your colors with the brayer, starting with the lightest color first.

An archival black ink seems to give the best color for stamping over this technique, as opposed to regular dye ink.

I layered my image on black cardstock with a 1/16th inch border all around, then onto Barn Red CS for the card base.

Tuesday, September 15, 2009

And the Winner Is...

Using the random number generator at random.org, I've selected a winner for the It's Your Day stamp set. And the winner is Tricia!

Tricia please send me your mailing address and I'll get your prize out to you. You can email me at thebrowns@earthlink.net

I hope to get another post up tomorrow or Thursday with some fun layouts I finished last weekend. Since preschool started last week, I've been busy trying to clear out some things that need to be removed when no one is home, lol! Tomorrow includes a trip to the consignment store & hopefully a few eBay listings.

Monday, September 7, 2009

Birthday Blog Candy

To celebrate my birthday, I'm going to give away a fun acrylic stamp set called "It's Your Day". This stamp set was last month's stamp of the month from Close To My Heart, and includes images & phrases perfect for birthdays & other celebrations.

Here's a sampling of artwork made using this fun stamp set:
Artwork is a sampling from various CTMH consultants.

I will choose a random winner from my followers on September 15th. So, if you don't currently follow my blog, I'd be happy to have you join my little group. I'll announce the winner sometime after noon (Central), so get signed up before then!

Want more birthday goodies? Sign up to receive my newsletter to get the scoop on a special birthday promo this week. I can't post it on my blog, so you have to get the newsletter to get the special. I use Constant Contact, so you can easily unsubscribe at any time.

Saturday, September 5, 2009

Challenge Card

I'm posting one card for two challenges today. First is the September sketch from Starving Artistamps over at Rubber Stamp Chat. Second is Color Chef Challenge #20 (I can't believe how many of these I've missed over the summer!).

My big inspiration for this card was the fun vintage image stamp I picked up on clearance over at Hobby Lobby last week. It's a Thanksgiving image from Paper Inspirations, and was a lot of fun to play with. So, here's what I came up with:


Kelly Jo's challenge was to use orange, gold, and cream. I chose Autumn Terracotta, Goldrush, and Colonial White, and added some Barn Red to darken things up a bit. I stamped my image 4 times w/ brown Staz-on ink. On one, I sponged my background. The next, I cut out the entire image, and colored the turkey platter and "back" arm. The third, I removed Jewel brads are from 7 Gypsies. Heart clip is source unknown, and stitching is by machine.

Thursday, September 3, 2009

Christmas Cards All Year 'Round monthly challenge

One of the funnest blogs I follow is Christmas Cards All Year 'Round. Each month, you need to make 5 Christmas cards that follow the theme/challenge for that month. Now normally I'm not very quick with these, but this month was especially easy: make any 5 Christmas cards, no restrictions. I was in a crafty mood, so over the last couple of days I've actually managed to finish my 5 cards for September ALREADY!

To make it more fun, I made all 5 cards with different supplies and played around with things a bit. Here's what I came up with:

The first card has a vintage, Victorian feel. The card base is from Hobby Lobby, and all other products are from Close To My Heart.

I stamped my image with Timber Brown Staz-on on white CS, and colored in using both markers and a water brush with ink pads. Image is popped up on adhesive squares.


Supplies used for the card to the right include a card base from Hobby Lobby; CS, ribbon, ink pads & gold EP from Close To My Heart, and stamps from Club Scrap.

I went with a simple design on this one, highlighting my main image by running my pigment ink pad along the edges and heat embossing with gold EP.


To the left is another vintage style card, this one uses large chipboard corners from Daisy D's, along with CS, hemp, stamp, & ink from CTMH. Eyelets are source unknown.


To the right is a fun little card, using Bazzil CS and Making Memories pattern paper. Stamps, ink, and ribbon are CTMH, and deckle edge square punch is from McGill.


I made this final card just so I could play with certain items! Other than the star button and the Stickles on said button, all supplies are from CTMH.

The presents along the bottom are actually from a border stamp, which I stamped in the three different colors and cut apart.

On the felt tree, I embossed with white EP to make it look snowy. (Not exactly how I wanted it too turn out, but EP sticks to felt like crazy!) I also used round clear Sparkles on my tree, and sponged around the edge of the entire card for definition.

Want in on the fun? Go visit "Christmas Cards..." and challenge yourself this month!

September Stamp of the Month artwork

For anyone who didn't get a chance to make it to my recent crop & open house, here's a little sampling of Stamp of the Month artwork for September. Close To My Heart's stamp set for this month is the beautiful "Treasures". Take a look at what I did with this stamp set, leftovers from the Twitterpated Workshop on the Go "Best" kit (contact me for info on the kit, as it's not available on our websites), and a few extra items:

First is a single page scrapbook layout (12x12).
A closeup on the glitter, EP, and ink shading.
A circle card from the Wishes card design book.
A standard sized note card.
This one contained some glitter as well - I use Liquid Glass to just dot on the glitter.
I showed this one before, using the recessed image technique from SCS.

If you want to see some more great ideas using the SOTM, there's a great CTMH consultant blog hop going on right now. I missed the signup deadline this month, so I'm not on their list, but there's a TON of great artwork on the hop, so check it out! You can start the hop over at Jena's blog.
Related Posts Plugin for WordPress, Blogger...