Saturday, June 30, 2012

Live Out Loud - July Stamp of the Month Blog Hop

Hello and welcome to our monthly blog hop!  If you are coming from Haley Dyer's blog, or if you are just starting out, you are in the right place.  When you're done here, you'll hop along to Teresa Scrivens' blog and see what she made for us this month.

This month's stamp set is Live Out Loud, a set of 8 graphic sentiments.  I particularly like this stamp set for scrapbooking, but of course I can see it used for all kinds of other cool projects as well!  Here's the layout I made with these stamps:


I thought these stamps added a fun addition to my layout.  I also cut some additional sentiments from one of the "zip strips" on one of the papers and adhered them to some chipboard hearts I covered using another paper.  I also distressed everything with my Cocoa ink pad, using a direct-to-paper method.

Here's a closeup of the stamp/heart on the left page:
And here's a closeup of the right:

Supplies used to make this layout:
OK, now don't forget to head over to Teresa's blog!

Wednesday, June 27, 2012

"Blessings" Challenge Card

I've decided to try and participate in challenges a little more frequently, to keep my mojo going and to pull out & use things I haven't used in a while (or at all).  Today, I'm using a stamp set that I love and just "had to have", but never actually used it - how sad!  Considering how well this card turned out, I think it's safe to say I will be using it more from here on out.  I'm also playing along with the challenges at Tuesday Morning Sketches (#152) and Heart 2 Heart (Wedding).


I stamped the vines & some leaves directly on the background in Olive ink (2nd generation for the solid portion).  Then I stamped some more leaves on a scrap paper and cut them out.  I stamped various sizes of the flowers on a scrap and cut those out as well.  Using the outline of the smallest flower, I stamped some in Olive randomly along the vines.

After cutting out the flowers, I used an embossing stylus (on the two larger sizes only) from the back side to curl back the flower petals, then I rolled it from the front side in the center only to give it some lift.  I adhered the larger flowers using 3-D foam tape, and glued the fat end only of the leaves I cut under the flowers.  I then curled forward the ends of the leaves.  I glued the smallest flowers directly to the paper, adhering smaller leaves under some of them.

I adhered Opaques Pearls to the centers of all of the flowers.  My bow at the top is some baker's twine from the Paradise Assortment - I poked holes right through the kraft card base and threaded it through on a needle and tied a bow.

Here's a closeup of some flowers - you can also see a bit of the background, which I filled in using the stipple brush from the Texture Tools set and some more Olive ink:

Supplies used to make this card are all from Close To My Heart:
 That's it for today.  Thanks for stopping by!  I hope to see you again soon.

Sunday, June 24, 2012

The Great Outdoors!

It's my turn again to share over the Cutters Creek blog! It's no secret how much I love Echo Park Paper, as I use it in nearly all of my Cutters Creek projects.

I have another Echo Park mini-theme layout to share with you today; this one is all about the Great Outdoors!  I personally don't do much camping; my husband says that my idea of roughing it is a hotel without room service.  He is just joking (I think!), but he has a bit of a point... so if you're like me you may wonder what use you may have for a "camping" kit.  Well, nicely enough, there are only a couple of elements that are specific to camping, and the pattern paper that has tents on it has plenty of other things on it as well to make it perfectly suitable for general outdoor pictures like hiking, picnics, and more.  Here's the first thing I've done with it:


These pictures are from a field trip to a local nature center.  The papers in this kit fit perfectly!  I cut one of the blocks from the Journaling paper to use as a title, and added a sticker element as a subtitle.  I used some more sticker elements and added them to some journaling circles - you can use punches or a cutting machine for the journaling shapes.

I used one circle to note the event and year.
I used another to point out how excited my daughter was to be there.
And I used a third, completing a visual triangle, to add a fun little image.

One little tip to note: one of the ricrac strips I added was a little bulky (the one at the top), so I popped up my smaller photos over it with foam adhesive so they didn't look lumpy.  To balance things out, I also popped up the small photo at the bottom right.

You can make a similar layout with just a few items:

Saturday, June 23, 2012

Template Winner

I have a winner from our Creations by AR blog hop - Skylight, you receive your choice of the new templates!  Please email Adela at creationsbyar@sbcglobal.net with your choice ASAP.

Thursday, June 21, 2012

Stars & Stripes Blog Hop with Creations by AR

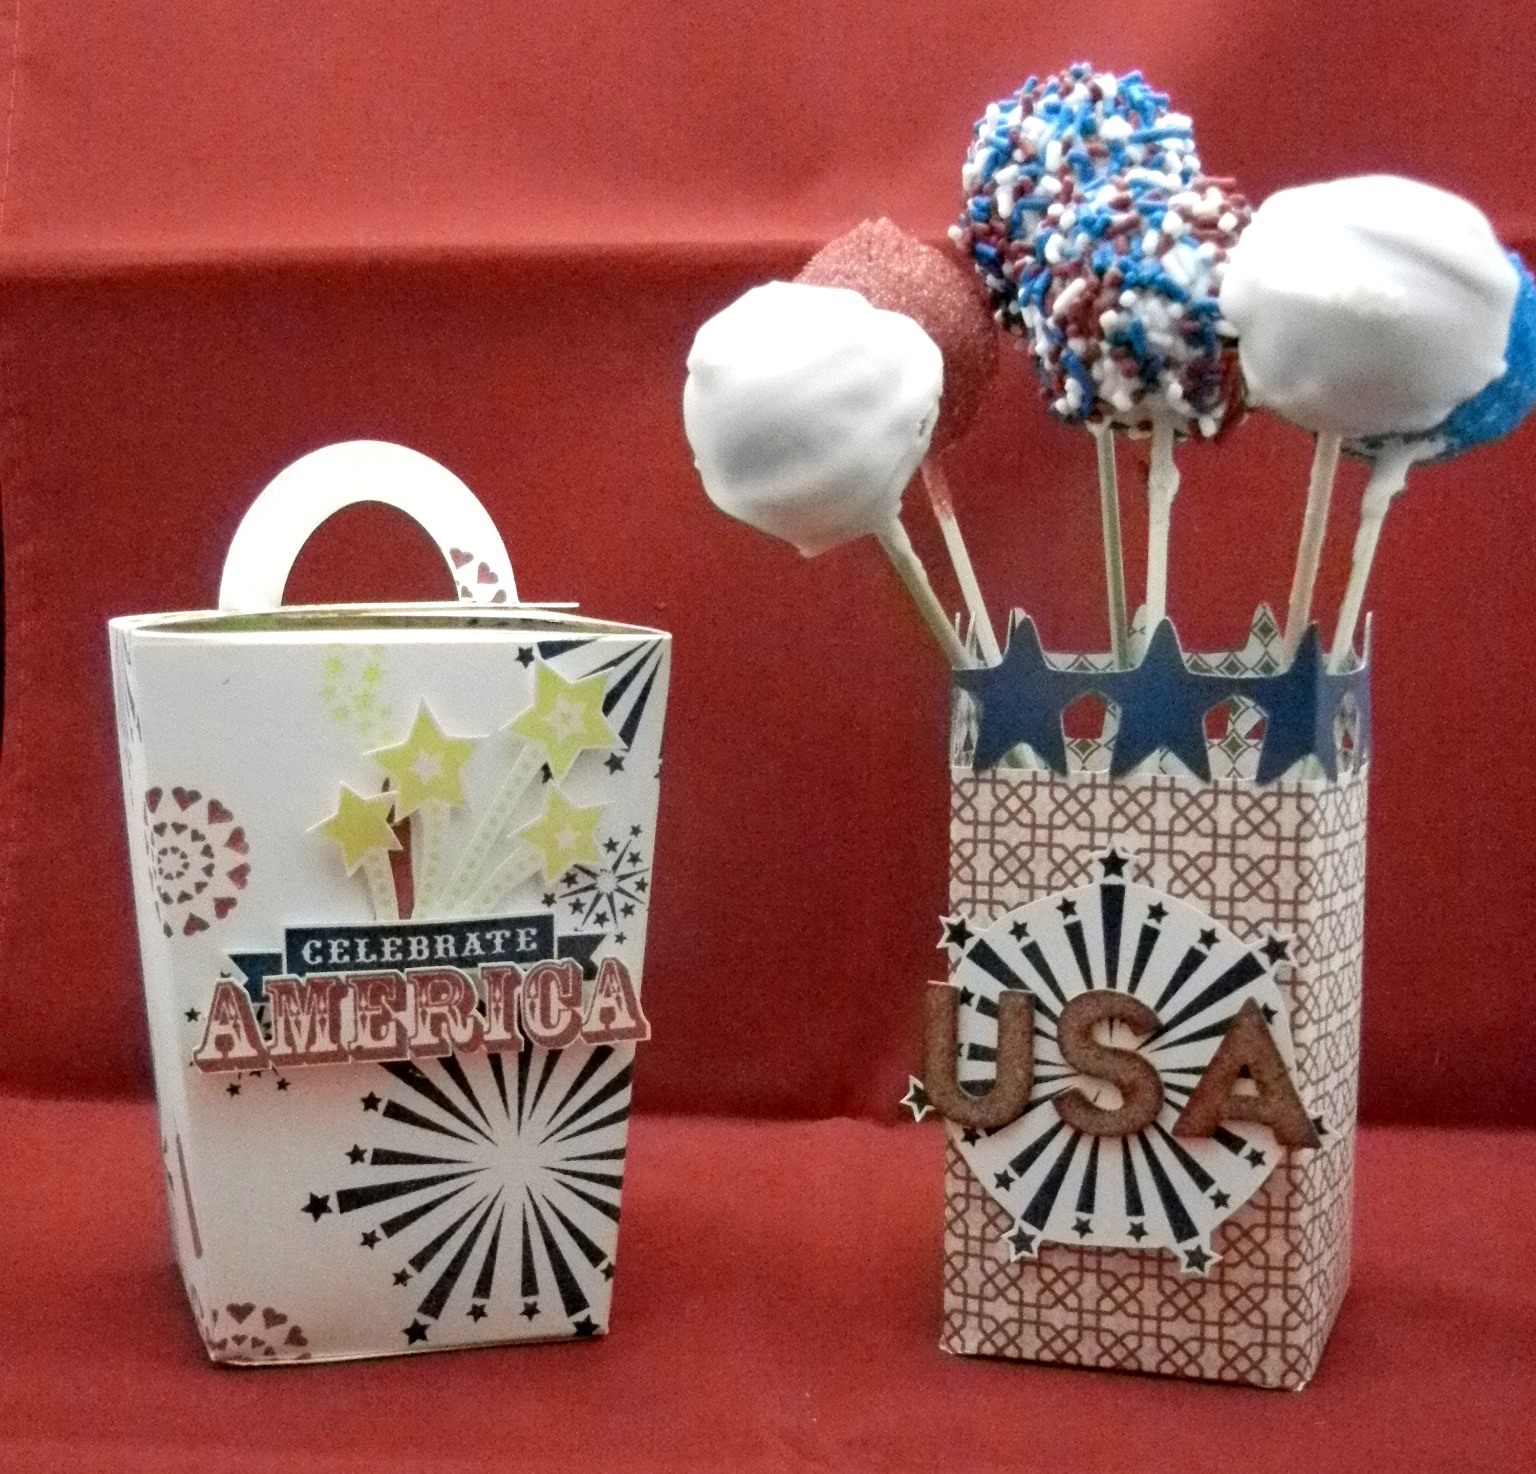
Hello and welcome to the Stars & Stripes new release blog hop with Creations by AR!  Today we are featuring two files: the Bordered Box set and a Gourmet Takeout Box.  All Creations by AR files come with 3 files - SVG, DXF, and PDF (for those of you who cut by hand).  I was having so much fun with these files I think I finished them in record time! You can win your choice of these great cutting files just by leaving a comment by Noon Central on Friday 6/22.


Here's a closer look at the Star Bordered Box (the set also comes with a heart bordered box and a diamond bordered box):

I chose to keep this one simple for a fun centerpiece.  (I'm thinking of making several more for my upcoming family reunion near the 4th!)  I used a basic pattern paper for the box and a solid cardstock for the stars.  I added a fun embellishment and it was ready to be filled.  I poured a bag of floral gems into the box and arranged my cake pops in them.  I wish I had some white tissue paper on hand to fill in with; I think it would look a lot better!

Now, for the awesome takeout box:
This file is so much fun - I cut it from plain white cardstock and used random stamping to decorate the box before I assembled it.  And let me just say that this box goes together perfectly!  Once the flaps are folded over the handles they stay put all on their own.  I stamped and cut out some embellishments to finish it off.  I can't wait to make some patriotic cookies to pack up in some of these!

Products used to make these boxes:
Be sure to check out all the other Design Team members' blogs for even more ideas using these box templates! (Don't forget to leave a comment before you go, for your chance to win your choice of these two files.)

Adela Rossol:   http://cbyar.blogspot.com/
Amy Park:   http://tethered2home.com/ 
Lisa Somerville:   http://www.lisasomerville.com/
Magdalena Cortez:   http://axesdesigns.blogspot.com/

Oh, and just in case you're interested, the cake pops were delicious!  I make mine the old-fashioned way, kind of.  Cake pops started as a way for bakers to use up the scraps of cake cut off from leveling or carving cakes, basically a way to make money off of crumbs!  I didn't have any crumbs around, so I made a new cake (from scratch).  I crumbled pieces into a bowl, mixed in some almond pastry filling, and kept mixing in more crumbled cake until I couldn't mix in any more.  (Most people mix theirs with frosting, but I didn't have any on hand and didn't want to make any!)  This resulted in a nice dense mixture that I could scoop with a small spring-loaded scoop.  I froze them for about 20 minutes while I melted some white candy melts.  I dipped skewers in the candy melts and stuck them in the pops, then I dipped the entire pop and decorated some.  Super easy and YUMMY!

Thanks for stopping by today!  I hope to see you again soon.

Wednesday, June 20, 2012

A Little Birdie Told Me...

that I need to remind you about some great promotions going on this month!  I have a sweet card to share with you first, of course.


I made this fun card using the Stella paper pack and this month's Stamp of the Month, Life is Tweet.  Sometimes stamped cards can feel a little flat if you aren't adding embellishments, so I have a few tricks for you!

  1. Stamp your image on the background cardstock AND on a pattern paper.  Cut the main part of the image out of the pattern paper and layer it over the stamped image on the background.
  2. Add more dimension by only adhering the centers of things like flowers and use a fingernail to curl them away from the background.
  3. Before adhering, use an X-acto knife to cut a portion of an image, like the wing of a bird, and use a fingernail to curl them up slightly.
  4. Add some small chipboard elements for added dimension.  (The hearts I used on my card come right in the Stella Workshop on the Go if you go that route.)
Now, want to get the best bargain ever on that sweet stamp set, and a few others as well?  This month is Stampaganza with Close To My Heart, which means that you get a free stamp set for every two that you buy.  Then you can get the Stamp of the Month set for only $5 when you spend $50.  So, here's a great example of the bargain you can get:

Buy 2 "D" size stamp sets for $17.95 each and get another free, buy 2 "B" size stamp sets for $9.95 and get another free, then buy the Stamp of the Month for $5.  You spend a total of  $60.80 (before tax & shipping) and you get $101.65 worth of stamps - pretty awesome, right?  If you're ready to spend a little and save a lot, head on over to the My Acrylix Stamp Sets portion of my website and start shopping! Don't forget to add the Stamp of the Month set to your cart before you check out!

Thanks for stopping by today!  Hope to see you again soon.

Tuesday, June 19, 2012

Superhero Card with Close To My Heart

Today I have a fun Superhero card to share with you.  I wanted to play along with a couple of challenges, and I was debating what kind of card to make... well, my youngest is a 7yo boy so he is at the age where he's getting invited to a lot of birthday parties.  So I chose to make a "boy" card that can easily be used for a birthday card.


I used the sketch for Mojo Monday 246 and Color Dare #4 from Color My Heart to create my card.  I altered the sketch slightly by rounding all of my corners to match the rounded corners on my clear card base.

You can really see the wow factor of these clear card bases in this picture.  By layering on both sides of the front and back of the card, you can really add depth to your design (and hide all of your adhesive at the same time)!


I just love this retro superhero guy - he is so cool!

Here are the supplies I used to make my card:
 I hope you'll take some time to play along with one or both of these challenges this week.  Be sure to let me know if you do so I can pop over and check out your project.  Thanks for stopping by to see what I've been up to!  I hope to see you again soon.
Related Posts Plugin for WordPress, Blogger...