Welcome to October's stamp of the month blog hop! This month we have 70 consultants sharing their ideas for the Share the Magic stamp set, so you're sure to find plenty of ideas. If you've come here from
Shannon Pelletier's blog, you're in the right place. If you're just starting out, you'll move on to
Melinda Everitt's blog when you're done here. Then continue along until you wind up back here.
These 12 stamps are, in my opinion, the cutest Christmas stamps you will ever see. But that doesn't mean they're just for kids. My project this month is a great pocket organizer for all of your Christmas needs. It fits right in my purse, and will hold all of our wish lists, shopping lists, receipts, gift exchange names, and more. Plus, it features some super cute paper piecing! You're sure to get compliments everywhere you go.
This organizer is super easy to make using our
True Fit Folios. For a complete tutorial, be sure to come back tomorrow, because today we're looking at some super easy paper piecing. Here's the front cover:
And here's the inside view of the pockets:
You can even use alphabet stamps to label each pocket to help keep you more organized. Now, here's the outside:
If you need even more room, you can use adhesive to attach things to the outside pages, like your menu or planning schedule. (Things you only have one of, as opposed to wish lists for each child, or various shopping lists.)
Now, if you'd like to see the easy steps needed for that cute Santa paper piecing, read on. If you're ready to hop, head on over to
Melinda's blog and see what she has created for us today.
 |
| Stamp using Archival Black ink on Vanilla Cream, white, Sunflower, and black CS, and both sides of the patterned paper. |
 |
| Use the Vanilla Cream as a base, and cut all the other colors out into pieces. |
 |
| Assemble all pieces except the second set of eyebrows. |
 |
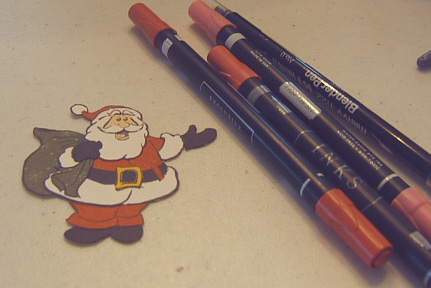
| Use markers and a blending pen to color Santa's tongue, lip, and cheeks. |
 |
| Using Liquid Applique, fill in all white area on Santa's suit. (Not his beard, etc.) |
 |
| After allowing the Liquid Applique to dry, use the heat gun to puff it up. Finally, attach the second set of eyebrows. |
 |
| Look how nice your completed Santa looks! |
|
|
Products I used in creating this project:
That's all for today; come back Saturday for the folding tutorial to create your own organizer. Now hop along to
Melinda's blog!


Santa came out great!
ReplyDeleteThis is a great idea. Love the piecing work on Santa!
ReplyDeleteReally cute project. I'm not familiar with some of these products so it's fun to see what you use and how you use it! Thanks.
ReplyDeleteYour Santa is really amazing and I can totally appreciate the time and talent that it takes to piece him together. Great project!
ReplyDeleteWhat a fantastic idea! I can envision many interpretations of this organizer - thanks for the inspiration! :)
ReplyDeleteVery, very cute Lori!
ReplyDeleteWow, so creative!
ReplyDeleteOh my gosh,I love it!
ReplyDeleteYou put an amazing amount of work into this adorable project! It's so nice!
ReplyDeleteCute, cute, Lori!!!
ReplyDeleteWow, what a lot of work you've done! Fabulous project.
ReplyDeleteBeautiful! The paper piecing looks perfect!
ReplyDeleteGreat project! Love the paper piecing on Santa!
ReplyDeleteThis comment has been removed by the author.
ReplyDeleteYour Santa turned out beautiful. What a great idea to start with the vanilla cream. It makes the perfect skin tone! What a beautiful TFF album this makes, too!!
ReplyDeleteI agree, cutest Christmas stamp set from CTMH in a while. I love your idea using the 12x12 folders.
ReplyDelete