Hello and welcome to our Close To My Heart new product blog hop! We are featuring some of the fabulous new products in the Autumn/Winter Idea Book that just went live August 1. If you've arrived here from
Dawn Ross' blog, or if you are just starting out, you are in the right place. When you're done here, you'll hop along to
Judy Faye Garner's blog and see what great item she has cooked up for us!
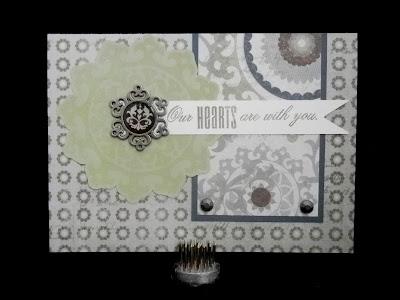
I'm sure you will see a lot of projects this time featuring our more-than-awesome NEW Cricut Cartridge collection, Artiste. But of course I could not resist adding just one more. I also wanted to feature our new Clementine papers, totally because I did not think I cared for these papers when I saw them in the book! But as soon as I saw them in person, I was totally converted and I hope you will love them too! Here is my project:
You may recognize our cute pup stamp from a previous catalog, but I think he is SO cute I had to use him. Plus, an image like this is great to color with our new
alcohol markers (available soon)! They weren't available yet when I created this, so I used my Copic markers, but if you want a less expensive alternative, ours are just the ticket! For just $5.95 you get TWO markers, the named color plus a shade lighter or darker (as indicated in the catalog). The colors I used here would be similar to Saddle and a combination of Twilight and Crystal Blue. You can choose any pink/red for his tongue. Then I used some Liquid Glass to make his nose and eye look shiny. I just love how he looks with those new
Clementine papers!
Now, for that fabulous
Artiste cartridge! One of the things I got most excited about was these awesome swing cards! There are 9 different designs on page 52 in the handbook. I chose the card that uses the "Card" key on the keypad (so you press the "Card" key, then press "s") and cut it at 5.5". That makes an approximately 4.25" x 5.5" card, and that center design is just slightly larger than the stamp of that shape that comes in the collection. (I stamped it in Twilight.) If you look in the handbook on page 35, you will see that same shape, plus a banner shape that is perfect for making both my sentiment banner and making the center shape look like an award ribbon. I cut all three of them at .75", two from pattern paper and one from Colonial White CS. To cut this shape, press the keys Shift Lock, Accent 4, then "5" on the keypad.
But WAIT, that's not all!
Pull the left side of the card to the left and, voila! The card "swings" and the image flips to something new. I cut another of that center shape to cover the award ribbon tails I attached to the back of the front one, and stamped the coordinating image. Next, I also cut the star shape at the size indicated on the carrier sheet for the "Super" star stamp and stamped the image in Sorbet ink. I lined the inside of the card with Sorbet CS and stamped my sentiment, from A Little Thanks stamp set, in Chocolate ink. I made sure to line up the sentiment so it would be hidden behind other card elements when the card is closed.
Note: To cut the pattern paper for the front/inside left of the card, I used a 6X6 piece of the paper on my cutting mat and cut the card shape again at 5.5" - and stopped it once it finished the "front" half of the card so it wouldn't cut into my mat too much. Then I just trimmed a bit off of each side to leave a border. When I assembled all the pieces, I popped the star image up with 3-D foam adhesive tape and attached the dog image with an adhesive spring.
I hope you enjoyed my project, and I'd love to hear your comments! If you have questions about any of our new (or existing) products, just let me know. I'm "the consultant with the know-how to show YOU how" and I love to answer questions.
Next, it's time to hop on over to
Judy Faye Garner's blog and check out her project! I hope to see you back here soon.


